This is a beginner-level tutorial.
Our goal is to create a peaceful game where you can steer a boat around a calm sea dotted with small, low-poly islands. I’m assuming you’ve already gone through my Pong and Flappy Bird tutorials (if not, it’s a good idea to do those first). But don’t worry – it’s not mandatory. You can jump straight into this 3D ride if you want.
Now lets begin!
Setting Up Your Project
First things first, let’s get our project ready.
- Open Godot.
- Click the Create button.
- Give your project a name, like “Boat Game”, and choose an empty folder for it.
- Click Create.
When you open Godot, you’ll see a bunch of panels and windows — don’t panic. We’ll only deal with a few key ones that actually matter for now:
- Scene Dock (Top Left): Shows all the parts (called nodes) that make up your game world.
- FileSystem Dock (Bottom Left): Works like a file explorer for your project — all your assets live here.
- Inspector (Right): Where you tweak properties of whatever node you’ve selected.
- Main View (Center): Your actual window into the 3D world — where the fun happens.
Finding a Boat
Our boat needs a 3D model. A fantastic resource for free, high-quality game assets is Kenney.nl.
- Download the sailboat 3D model from here.
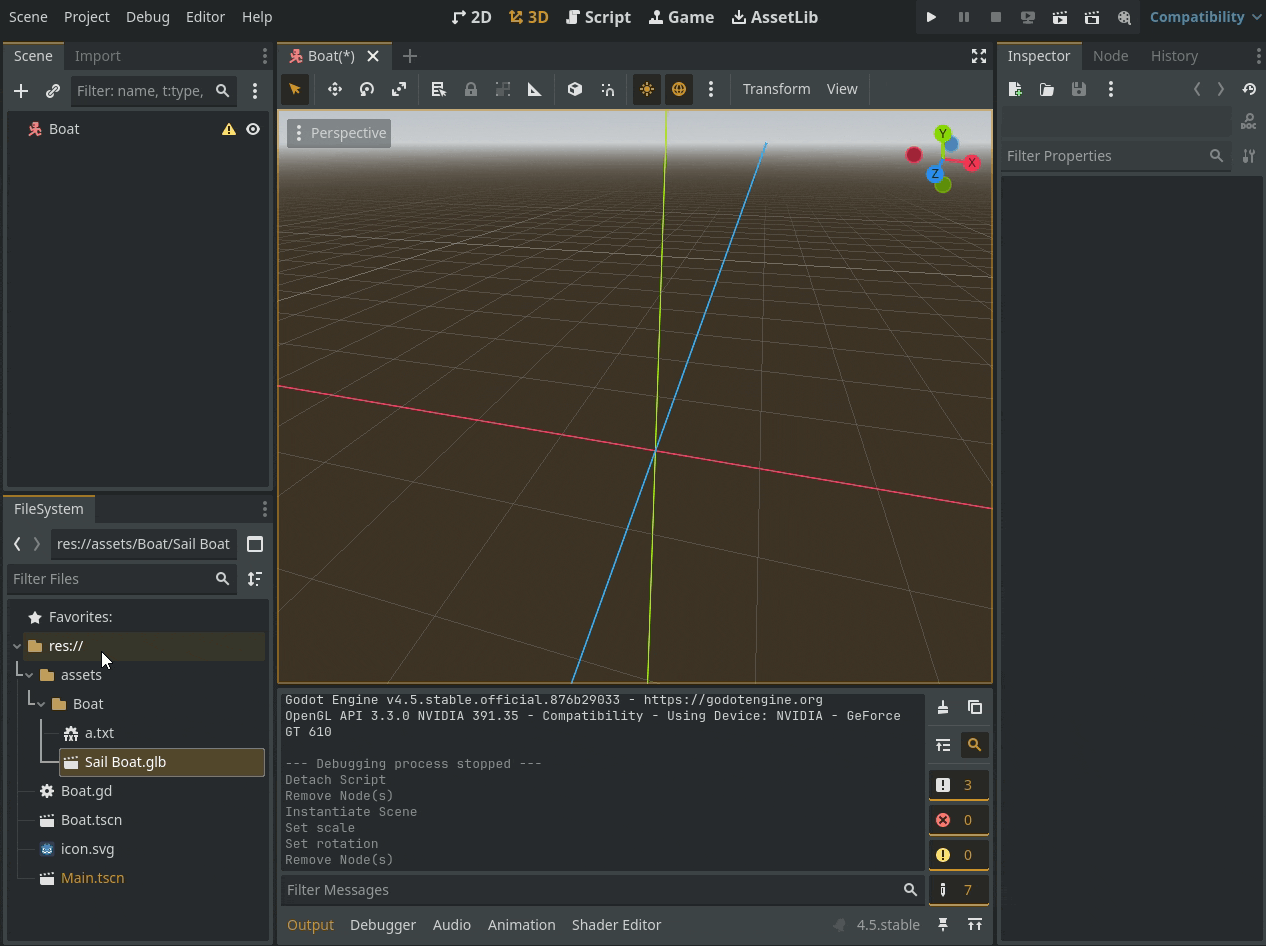
- You’ll find a file named
Sail Boat.glb. This is the model we’ll use. - Back in Godot, in the FileSystem dock, right-click on
res://and select New Folder…. Name itassets. - Right-click on your new
assetsfolder and create another new folder inside it calledBoat. - Move the
Sail Boat.glbassets/Boat/folder from your computer’s file explorer directly. It will start appearing in Godot’s File System dock as well.
Great! Our boat is now ready in the project.
Creating the Player Boat
Now, let’s build our boat scene. It’s good practice to create the player in its own “scene” so we can easily reuse it or modify it later.
- In the Scene dock, click the + button. A popup will show up.
- Choose CharacterBody3D (hint: use search to find it faster). Press the
Createbutton at bottom. This will create aCharacterBody3Das the root. – This node is Godot’s special tool for characters that need to move and collide with the world. - Right-click on
CharacterBody3Din the Scene Dock and select Rename. Name itBoat.
Add the 3D Model:
Let’s make our boat visible!
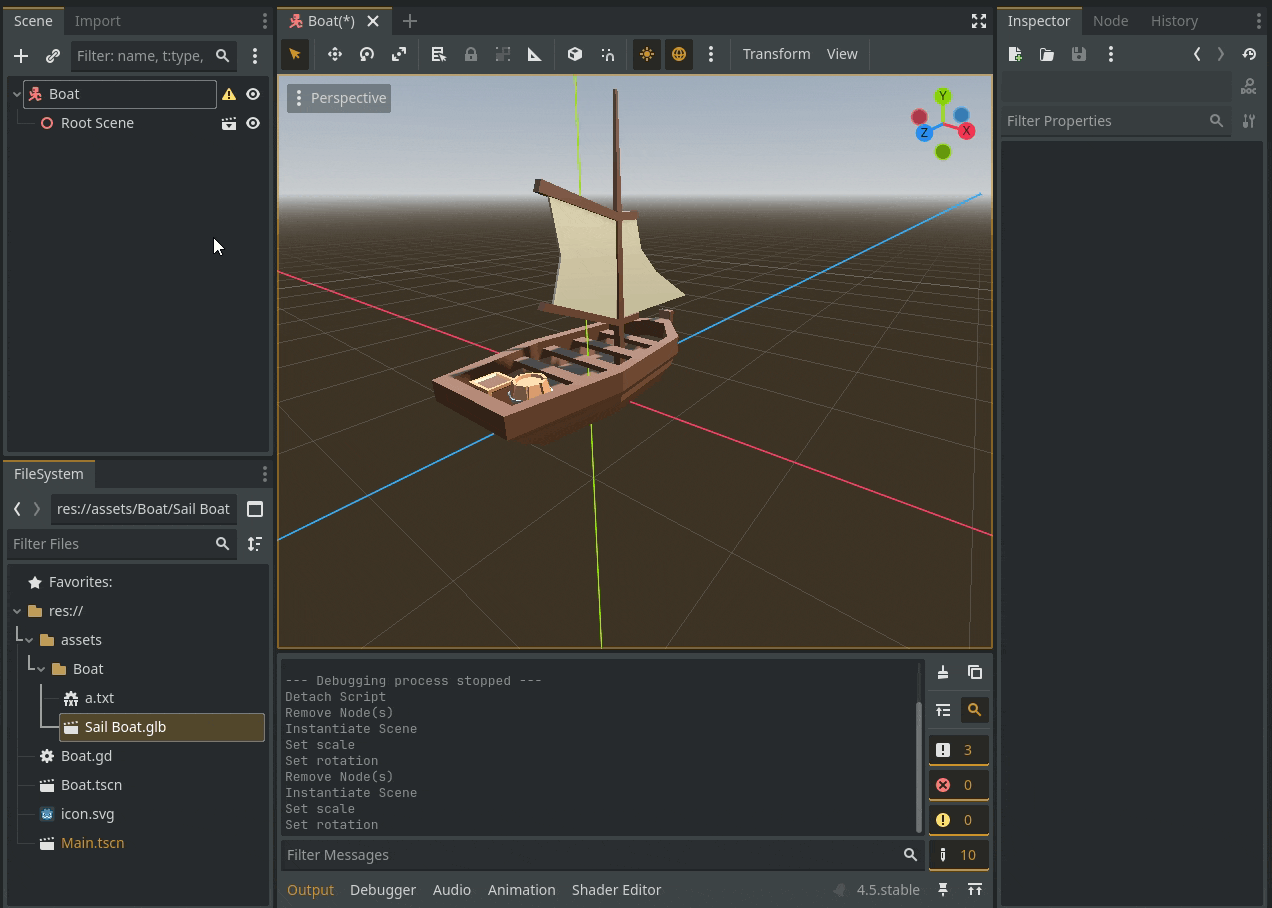
- Select the
Boatnode. - Drag
Sail Boat.glbfrom the FileSystem dock onto theBoatnode in the Scene dock. This will instance your model as a child of the boat. - The boat model is probably not the right size or orientation. Select the boat model node. In the Inspector, find the Transform section. Set the Scale to
(3, 3, 3)and the Rotation Degrees Y-axis to180. This makes it bigger and ensures it faces “forward” in Godot’s coordinate system (which is along the negative Z-axis).
Add a Collision Shape:
The physics engine needs to know the boat’s shape to handle collisions.
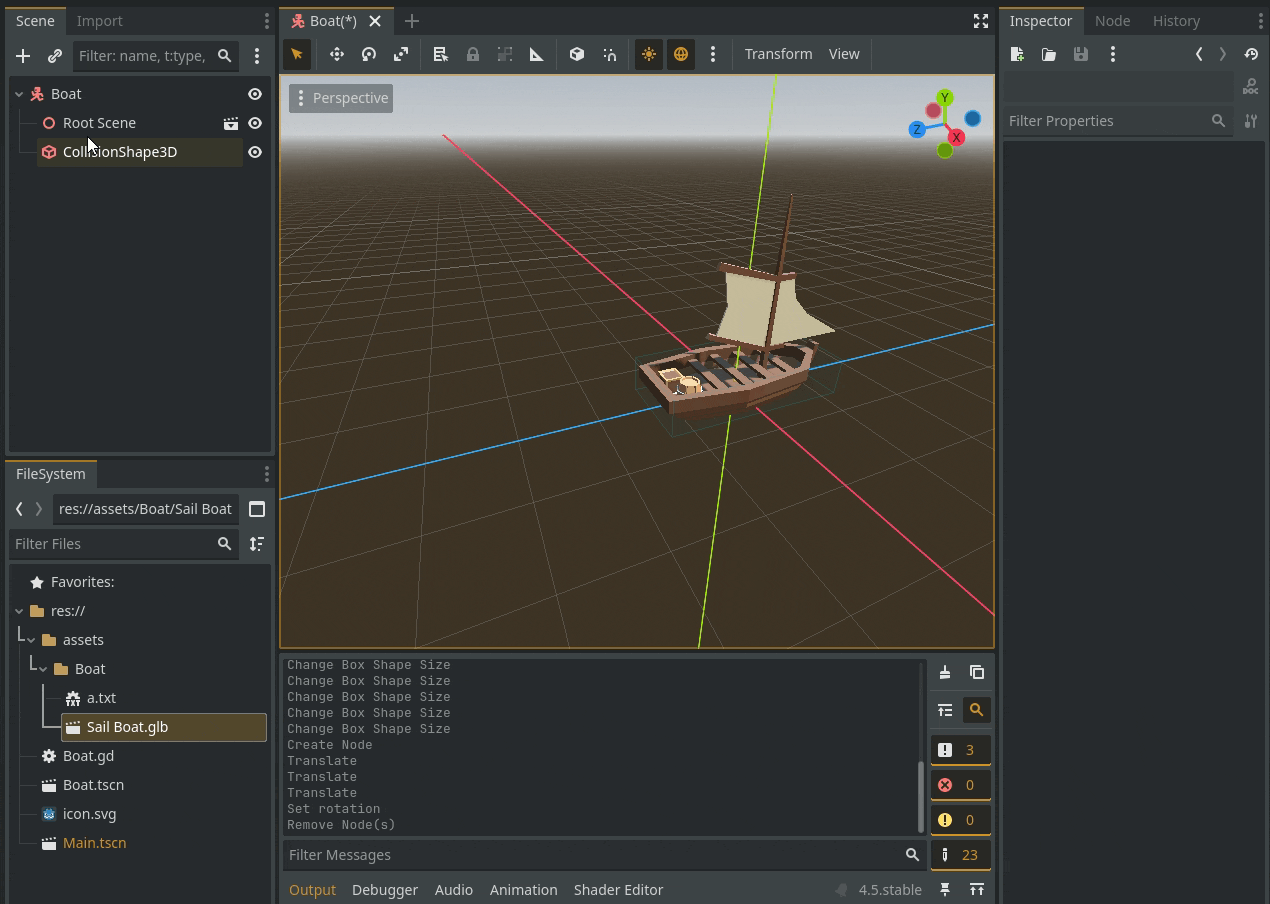
- Select the
Boatnode again. - Click the + button above it to add a child node.
- Search for and add a CollisionShape3D. Create it. – You’ll see a warning icon because it needs a shape.
- With
CollisionShape3Dselected, go to the Inspector on the right. Next to theShapeproperty, click[empty]and choose New BoxShape3D. - You’ll see a wireframe box. In the 3D view, we will use the dots to resize the box so it roughly covers the main body of our future boat model.
CollisionShape3D setup defined above.Add a Camera:
We need a camera to see the game. By making it a child of the boat, it will automatically follow it.
- Select the
Boatnode. - Click + and add a Camera3D.
- Position the camera behind and slightly above the boat. A good starting position is:
- Position:
(0, 4, 6) - Rotation Degrees:
(-15, 0, 0)
- Position:
Your scene should now look something like this:
Boat (CharacterBody3D)
 L-- CollisionShape3D
 L-- Root Scene (its your Boat Model) [Your .glb instance]
 L-- Camera3D
Save Your Scene! Press Ctrl+S and save it as Boat.tscn.
Making the Boat Move
Time for some code! This script will handle the boat’s movement, turning, and bobbing.
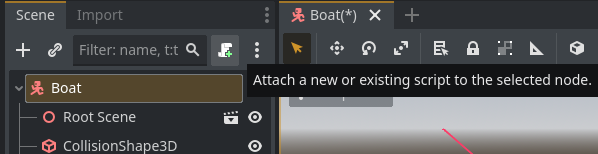
Select the Boat root node. Then find the button above it to create a new script (this button looks like a scroll with a green plus icon). See image below:
Name your script as Boat.gd and click Create. The script editor will open. Delete all the default text and replace it with this:
extends CharacterBody3D

# Boat settings
var max_speed = 15.0
var acceleration = 2.0
var deceleration = 1.5
var max_turn_speed = 2.0
var min_turn_speed = 0.3

# Current speed
var current_speed = 0.0

# Bobbing motion (always active)
var bob_time = 0.0
var bob_amount = 0.2
var bob_speed = 1.2

func _physics_process(delta):
    # Get input from the Up/Down arrow keys
    var move_input = Input.get_axis("ui_down", "ui_up")
    # Get input from the Left/Right arrow keys
    var turn_input = Input.get_axis("ui_left", "ui_right")

    # Smoothly change speed
    # If we are pressing up or down, move towards our max speed.
    if move_input != 0:
        current_speed = move_toward(current_speed, move_input * max_speed, acceleration * delta)
    # Otherwise, slow down to a stop.
    else:
        current_speed = move_toward(current_speed, 0.0, deceleration * delta)

    # This makes turning feel more realistic. The boat turns faster when it's moving fast.
    var speed_ratio = abs(current_speed) / max_speed
    var turn_speed = lerp(min_turn_speed, max_turn_speed, speed_ratio)

    # Apply the turn based on our input and calculated turn speed.
    rotate_y(turn_input * turn_speed * delta)

    # We want to move forward/backward, which is along the Z-axis of the boat.
    # The "-transform.basis.z" is Godot's way of saying "my local forward direction".
    velocity = -transform.basis.z * current_speed

    # --- Add some life with a bobbing motion! ---
    # We use a sine wave to create a smooth, repeating rocking motion.
    bob_time += delta * bob_speed
    var bob_intensity = lerp(bob_amount, bob_amount * 0.3, speed_ratio) # Rock less when moving fast
    # We get the boat model node and apply the rocking rotation to it directly.
    get_node("BoatModel").rotation.z = sin(bob_time) * bob_intensity

    # This is the magic function that actually moves our CharacterBody3D and handles collisions.
move_and_slide()Don’t worry if this looks complex! The comments in the code explain what each part does. The key idea is that we check for player input, calculate a speed and direction, and then tell Godot’s move_and_slide() function to handle the rest.
Save your script (Ctrl+S). Your boat is now fully functional!
Building the World
Let’s create the sea and islands for our boat to sail in.
On bottom-left panel (File System), right-click and select an option to create a new 3D scene. Rename the root Node3D to Main. Save it as Main.tscn. This will be our main game level.
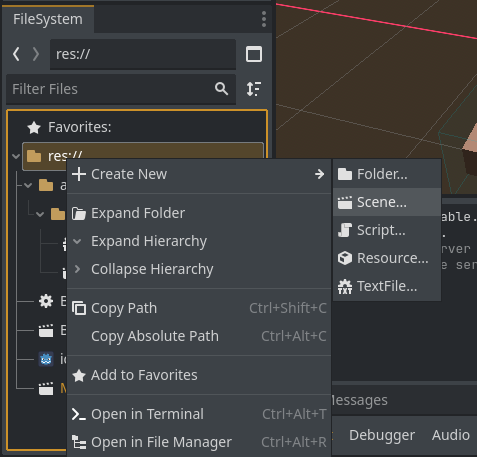
Create New -> Scene is used to create a new scene. When you press it, you will see a popup. Make sure to select Node3D in that popup and type Main as the name of the new scene.Add the Sky and Sun:
- Select the
Mainnode. Add a WorldEnvironment node. This node controls the overall look of your world. - In the Inspector, next to
Environment, click[empty]and choose New Environment. - Click on the new
Environmentresource to open its properties. - Go to the
Backgroundsection. SetModetoSky. - Next to
Sky, click[empty]and choose New Sky. - Click the new
Skyresource. Next toSky Material, click[empty]and choose New ProceduralSkyMaterial. You now have a beautiful, dynamic sky! - Now for light. Select the
Mainnode again and add a DirectionalLight3D node under it. This acts as the sun. - In the 3D view, use the curved arrows to angle the light until you get some nice shadows. This will make your scene look much more dynamic.
Create the Islands:
- Select
Main. Add a MeshInstance3D node under it. Rename itIsland. - In the Inspector, next to
Mesh, click[empty]and choose New SphereMesh. Set itsRadiusandHeightto some big values like 40 and 20 respectively (you can find these two options in inspector when you click and expand theSphereMeshresource). - To make it look like an island, we just need to move it down! In its Transform, set the Y Position to
-6. - It needs a color. Under
Material Overridein the Inspector, click[empty]and choose New StandardMaterial3D. - Click the new material to open its properties. Go to
Albedoand pick a sandy yellow color. - You have one island! To make more, simply right-click the
Islandin the Scene dock and choose Duplicate (or press Ctrl+D). Move the new island to a different spot. Repeat this a few times, changing their scale in the Transform properties to make them look different. Spread them out!
Making Our Ocean
This is the most exciting part! We’ll create a large plane and apply a special “shader” to it. Shader is a program that tells the GPU how to draw something. This is how we’ll get our beautiful, stylized water effect.
- Select the
Mainnode. Add a MeshInstance3D and name itWater. - In the Inspector, next to
Mesh, choose New PlaneMesh. - Click on the
PlaneMeshto expand its properties. Set its Size X and Y to1000. Now you have a huge plane covering your scene. - Time to create the material. In the Inspector, under
Material Override, click[empty]and choose New ShaderMaterial. - Click on the new
ShaderMaterial. Next to itsShaderproperty, click[empty]and choose New Shader. - The Shader Editor will pop up at the bottom. Delete everything in that editor window.
- Now, copy the entire block of code below and paste it into the empty shader editor.
shader_type spatial;
render_mode unshaded; // This makes it look flat and cartoony, ignoring lights.

// -- Water Colors --
uniform vec4 deep_color : source_color = vec4(0.357, 0.608, 0.976, 1.0);
uniform vec4 foam_color : source_color = vec4(0.6, 0.8, 1.0, 1.0);

// -- Wave Controls --
uniform float noise_scale = 256.0;
uniform float time_speed = 0.001;
uniform float foam_hardness : hint_range(0.0, 1.0) = 0.9; // How sharp the edge is
uniform int octaves = 2; // How many layers of noise to add for detail

// --- Noise Functions (The Magic Behind the Waves) ---

// A simple function to generate a random-ish number from a 2D vector
float random(vec2 st) {
    return fract(sin(dot(st.xy, vec2(12.9898, 78.233))) * 43758.5453123);
}

// 2D Noise function based on the random one
float noise(vec2 st) {
    vec2 i = floor(st);
    vec2 f = fract(st);

    // Four corners in a grid
    float a = random(i);
    float b = random(i + vec2(1.0, 0.0));
    float c = random(i + vec2(0.0, 1.0));
    float d = random(i + vec2(1.0, 1.0));

    // Smoothly interpolate between the corners
    vec2 u = f * f * (3.0 - 2.0 * f);
    return mix(a, b, u.x) + (c - a) * u.y * (1.0 - u.x) + (d - b) * u.y * u.x;
}

// FBM - Fractional Brownian Motion (adds layers of noise)
float fbm(vec2 st) {
    float value = 0.0;
    float amplitude = 0.5;
    float frequency = 0.0;

    for (int i = 0; i < octaves; i++) {
        value += amplitude * noise(st);
        st *= 2.0;
        amplitude *= 0.5;
    }
    return value;
}


// --- Main Fragment Shader ---

void fragment() {
    // Animate the UV coordinates using TIME
    // We create two layers of noise moving in different directions for a more natural look
    vec2 motion1 = vec2(UV.x + TIME * time_speed, UV.y + TIME * time_speed);
    vec2 motion2 = vec2(UV.x - TIME * time_speed, UV.y + TIME * time_speed * 0.5);

    // Calculate two layers of FBM noise and add them together
    float fbm_value = fbm(motion1 * noise_scale) + fbm(motion2 * noise_scale);

    // Use step() to create a hard, cartoony edge between the two colors
    float toon_mask = step(foam_hardness, fbm_value);

    // Mix the two colors based on our toon mask
    vec3 final_color = mix(deep_color.rgb, foam_color.rgb, toon_mask);

    // Apply the final color to the object
    ALBEDO = final_color;
}As soon as you paste this, you should see your water plane come to life!
The best part? You can customize it without touching the code.
- Select your
Waternode. - In the Inspector, click on the
ShaderMaterialagain. - You’ll see a section called Shader Parameters. Expand it.
- Here, you can play with the values!
- Deep Color: The main color of the water.
- Foam Color: The color of the wave crests.
- Noise Scale: Try a big number like
250. This is like “zooming out” on the waves. - Time Speed: A very small number like
0.001will give a slow, calm effect. - Foam Hardness: A high value like
0.9creates very sharp, defined foam edges for that cartoony look.
Play the Game!
We have the boat, we have the world. Let’s put them together.
- In your
Main.tscn, dragBoat.tscnfrom the FileSystem dock into the main 3D view or the Scene dock. Your boat will appear in the world! - Now we need to tell Godot that
Main.tscnis the scene to run when the game starts. On top menu, click Project > Project Settings. Under the Application/Run section, click the folder icon next to Main Scene and choose yourMain.tscn. Then close the popup. - You’re ready! Press F5 on your keyboard to play your game.
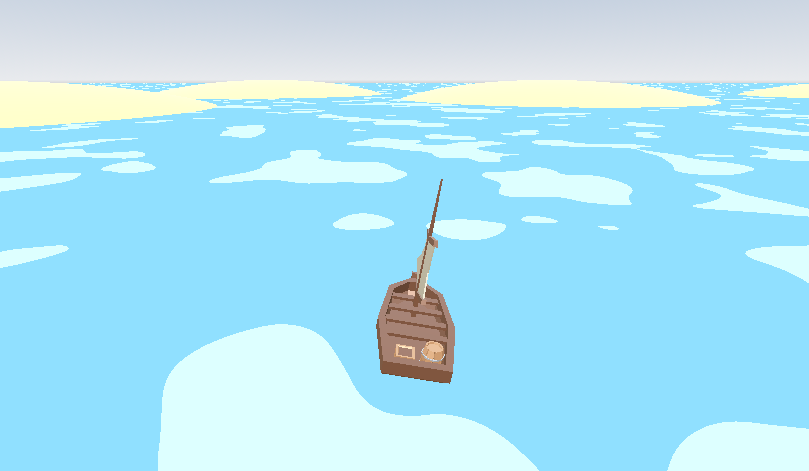
Use the arrow keys to sail your boat around the world you’ve created.
Congratulations! You’ve just built a complete 3D game in Godot. You’ve learned how to set up scenes, handle player movement, build a world, and even use a powerful shader to create a beautiful, living water effect. Now go sail and enjoy the calm!!
If you like the tutorial, let me know in the comments. <3
You can find the completed GitHub project here.