This is a beginner-level tutorial.
Hello and welcomeee! If you’re a beginner wishing to make video games, then this post is for YOU. Together, we are going to build the timeless arcade classic, Pong, from a completely blank project using Godot engine.
You can also take a look at Flappy bird tutorial and this simple 3D boat game. But here let’s continue to Pong!
Let’s begin weeeeeeeeee!
First, We Make a Godot Project
Every great game starts with a blank canvas. Let’s create ours and tell Godot which keys our players will use.
- Download Godot Engine: From here. Extract the zip, and open the executable.
- Create a New Project: When you open Godot, click the Create button. Give it a name like “MyPongGame” and choose an empty folder for it to live in.
- Input Map: Once project is created, we need to define our controls. Think of this like setting up the controller layout in a console game.
- In the top menu, go to Project -> Project Settings…
- A new window will pop up. Click on the Input Map tab at the top.
- Here, we’ll create actions for Player 2. (Player 1 will use the default arrow keys).
- At the top of the list, find the text box that says “Add New Action”. Type
p2_upand press Enter. - Do it again and add another action named
p2_down. - Now, find
p2_upin the list and click the “+” icon to its right. Choose “Keyboard Keys” and select the W key. - Do the same for
p2_down, but assign it the S key.
- Set Game Resolution: Now come back to General tab, and click
Display -> Window, and under Size section, set Viewport Width to 320 & Viewport Height to 224. Then under Stretch section, set Mode to viewport. Press theClosebutton at bottom to close this panel now.
What did we just do? We told Godot that we have two abstract actions, p2_up and p2_down. We then “mapped” them to the W and S keys. This is great because if we wanted to add controller support later, we could just map a joystick direction to the same action without changing any code! Lastly, we set a custom resolution to define our game’s base size, and used stretch mode: Viewport so the whole screen scales evenly on any display.
When you open Godot, you’ll see a bunch of panels and windows — don’t panic. We’ll only deal with a few key ones that actually matter for now:
- Scene Dock (Top Left): Shows all the parts (called nodes) that make up your game world.
- FileSystem Dock (Bottom Left): Works like a file explorer for your project — all your assets live here.
- Inspector (Right): Where you tweak properties of whatever node you’ve selected.
- Main View (Center): Your actual window into the 3D world — where the fun happens.
Creating the Player Paddle
In Godot, everything is made up of Nodes. A collection of nodes saved together is called a Scene. Think of a Scene as a reusable blueprint for a game object. Let’s build a blueprint for our paddle.
Building the Paddle Scene
In the Scene dock (usually on the left), click the “+” button to create a new scene.
A “Create New Node” dialog will appear. Search for CharacterBody2D and create it. What is CharacterBody2D? It’s a special node type designed for things you want to control directly with code (like a player character or, in our case, a paddle). It comes with built-in features for moving and colliding.
Rename the node. Double-click on CharacterBody2D in the Scene dock and rename it to Paddle.
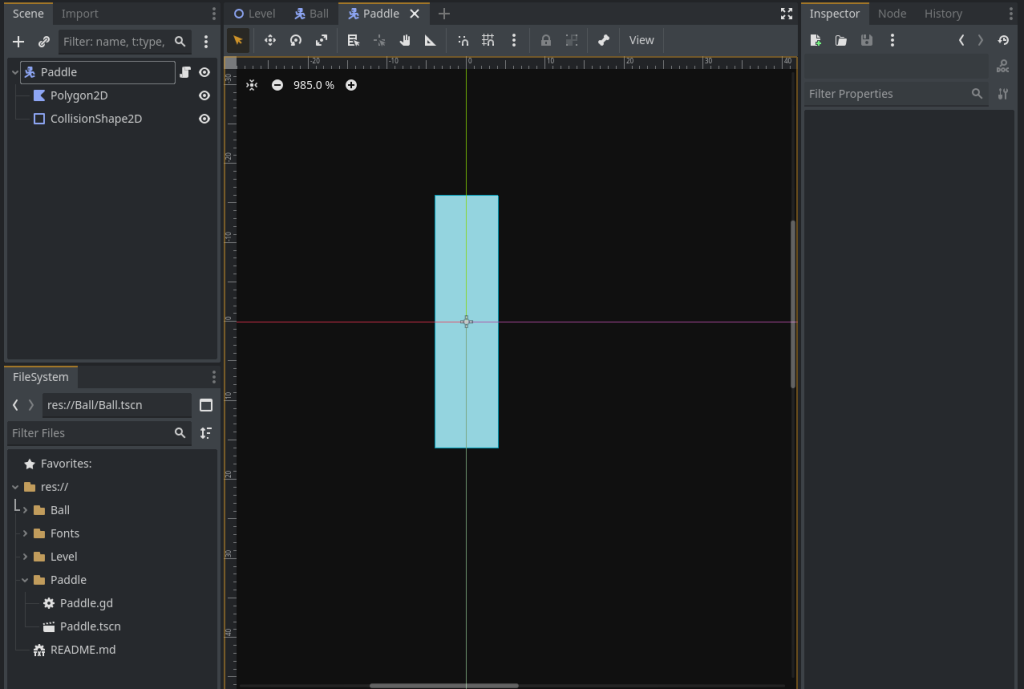
Give it a visual shape. A node by itself is invisible. We need to add child nodes to define what it looks like and how it behaves. Right-click on Paddle and choose “Add Child Node”. Find and add a Polygon2D. This node lets us draw a simple shape. With this node selected, place four points in the editor canvas to make a paddle.
Give it a physical shape. Right-click on Paddle again and add a CollisionShape2D. Then on the inspector (usually at right), click the Shape <empty> and select the RectangleShape2D. This invisible shape is what the physics engine uses to detect hits. It’s the paddle’s “hitbox”.
Your paddle scene should now look something like this:
Making the Paddle Move with Code
Time to bring it to life!
- Select the Paddle root node. In the Scene dock, click the little scroll icon with a plus sign (“Attach a new or existing script to the selected node”).
- A dialog will pop up. Just click Create.
- Replace all the default text with this code:
# FILE: Paddle/Paddle.gd
extends CharacterBody2D

# These variables will show up in the editor!
@export var speed = 400
@export var up_action = "ui_up"
@export var down_action = "ui_down"

# This function runs once when the paddle is created.
func _ready():
	# Add this paddle to a group called "paddles". We'll use this later.
	add_to_group("paddles")

# This function runs every single physics frame. Perfect for movement!
func _physics_process(delta):
	var direction = 0
	if Input.is_action_pressed(up_action):
		direction = -1 # In 2D, negative Y is up
	elif Input.is_action_pressed(down_action):
		direction = 1 # Positive Y is down

	# Set our vertical velocity
	velocity.y = direction * speed

	# This is the Godot function that actually moves our character
	move_and_collide(Vector2(0, velocity.y * delta))

	# Stop the paddle from going off-screen
	var screen_size = get_viewport_rect().size
	var paddle_height = 32 # The height of our paddle
	position.y = clamp(position.y, paddle_height / 2, screen_size.y - (paddle_height / 2))
Code Breakdown:
@export var ...: This is a super neat Godot feature. Any variable with@exportin front of it will appear in the Inspector dock. This will let us change the controls for Player 2 without writing a new script!_physics_process(delta): This is a special Godot function that is designed for code related to movement and physics. It runs at a steady rate to keep movement smooth.Input.is_action_pressed(...): This is how we check the Input Map we set up earlier. We’re asking, “Is the key for the ‘ui_up’ action being held down?”move_and_collide(...): This is the built-in function fromCharacterBody2Dthat moves our object and makes it stop if it hits something.clamp(...): This function is a simple way to say “keep this value between this minimum and this maximum.”
Save your scene! Press Ctrl+S and save it as Paddle.tscn. You’ve made your first reusable object!
Lets Create a Ball Now!
We’ll follow the same process: create a scene, add nodes, and write a script.
Building the Ball Scene
Create a New Scene. For this, first we need to switch to a new window as shown in image below:
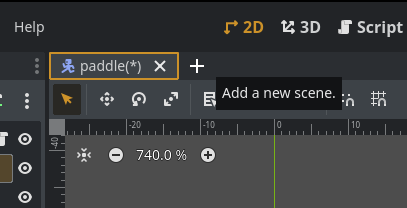
+ button next to paddle scene. It will open new window.In this new window, create a CharacterBody2D node, similar to how we created earlier for Paddle. Rename it to Ball.
Add a Sprite2D as a child node. In the Inspector, you can drag an image into the Texture property. A simple white circle PNG file is perfect. We just need a png image that looks like a ball!
Add a CollisionShape2D. In the Inspector, give it a New CircleShape2D and resize it to match your sprite.
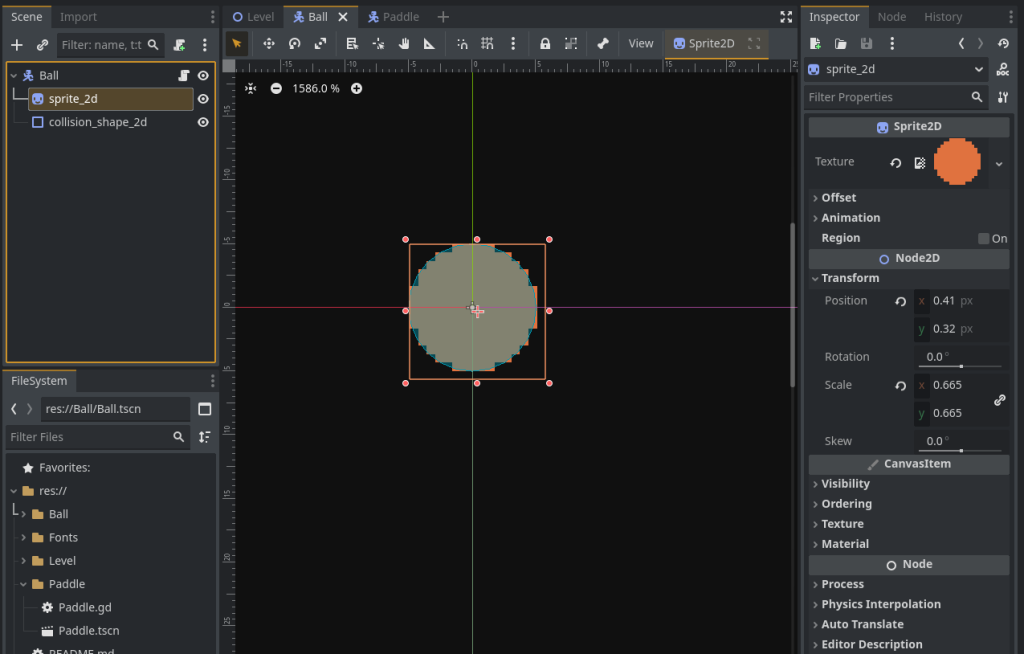
Scripting the Ball’s Bouncing Logic
Attach a new script named Ball.gd to your Ball node. This script is the most important one for gameplay.
# FILE: Ball/Ball.gd
extends CharacterBody2D

# This is like an alarm the ball can send out.
signal out_of_bounds

# The speed of the ball.
@export var speed = 200

# This function will reset the ball's position and velocity.
func start():
	# Put the ball in the middle of the screen
	position = get_viewport_rect().size / 2

	# Give it a random starting direction
	var direction_x = 1.0 if randf() > 0.5 else -1.0 # Go left or right
	var direction_y = randf_range(-0.5, 0.5) # Go slightly up or down

	# Apply the direction and speed. .normalized() keeps the speed consistent.
	velocity = Vector2(direction_x, direction_y).normalized() * speed

# This function is called automatically when the game starts.
func _ready():
	start()

func _physics_process(delta):
	# Check if the ball went off the left or right edge
	if position.x < 0 or position.x > get_viewport_rect().size.x:
		out_of_bounds.emit() # Sound the alarm!
		start() # Reset the ball

	# Check if the ball went off the top or bottom edge
	if position.y < 0 or position.y > get_viewport_rect().size.y:
		start() # Just reset it for now

	# Move the ball and check if we hit anything
	var collision = move_and_collide(velocity * delta)

	# If we hit something...
	if collision:
		# "bounce" is a handy function that reflects the velocity perfectly
		velocity = velocity.bounce(collision.get_normal())

		# Let's make the game harder as it goes on!
		var thing_we_hit = collision.get_collider()
		if thing_we_hit.is_in_group("paddles"):
			velocity *= 1.05 # Increase speed by 5%
Code Breakdown :
signal out_of_bounds: This is a core Godot concept! A signal is a message that a node can send out to any other node that is listening. Our ball will “emit” this signal when a point is scored. It doesn’t know who will update the score, it just shouts, “I’m out of bounds!”start(): We created our own function here to handle everything needed to start or restart a round. This keeps our code organized.emit(): This is the command to send our signal out into the game world.collision.get_collider(): When a collision happens, this tells us what we hit. We then check if it’s in the “paddles” group we created earlier.
Save this scene as Ball.tscn. All our game pieces are now built!
Assembling the Game Level
It’s time to put everything together on our main stage.
- Create one last New Scene.
- For the root node, choose
Node2D. This is a simple 2D node perfect for organizing our level. Rename it to Level. - Add a background: Add a
ColorRectnode as a child ofLevel. Drag the control points of thisColorRectnode to make it big enough so it covers enough of the screen. Then pick a dark color for the background. - Instance your scenes: This is where Godot’s power shines. In the FileSystem dock (bottom-left), find your
Paddle.tscnfile. Drag and drop it into the main viewport or the Scene dock.- Position this paddle on the left side of the screen.
- Now, do it again! Drag another
Paddle.tscninto the scene. Position this one on the right. Rename it toPaddle2. - Select
Paddle2. In the Inspector, you’ll see the script variables we exported! Change its Up Action top2_upand its Down Action top2_down. Voila! You now have a working second player with different controls. - Finally, drag your
Ball.tscninto the scene as well.
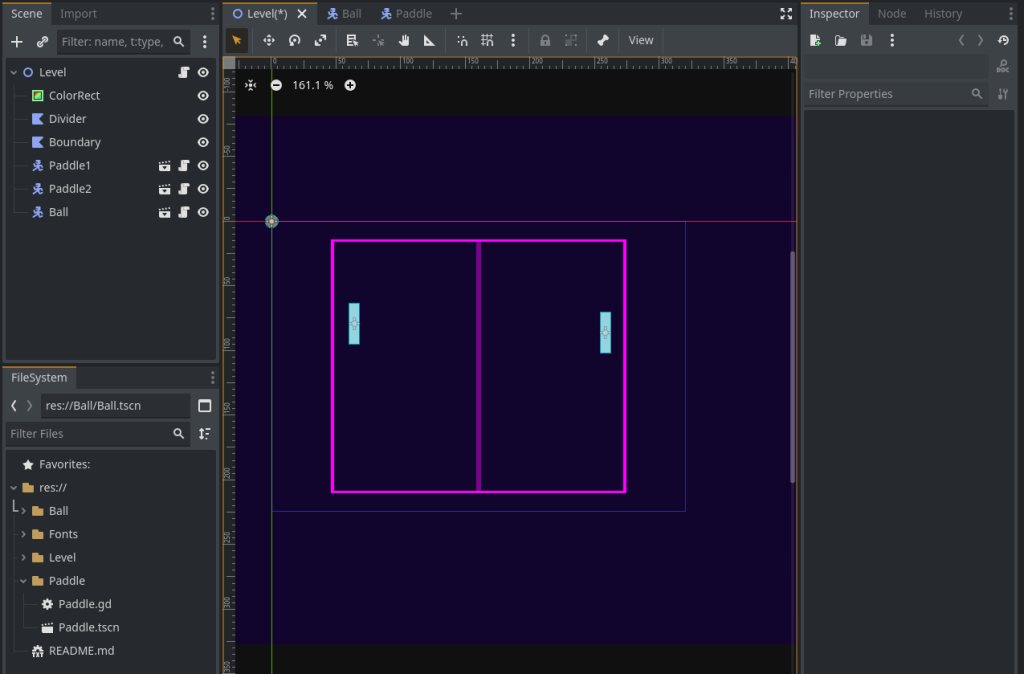
Your main Level scene is now assembled!
Optional: You can make few Polygon2D nodes to make four corner lines and a line in the middle so your level looks pretty. This is how it looks like (with all these lines and stuff included):
Adding the Score and Final Logic
The last step is to create a UI to display the score and a script to manage the game.
Creating the Score UI
- In your
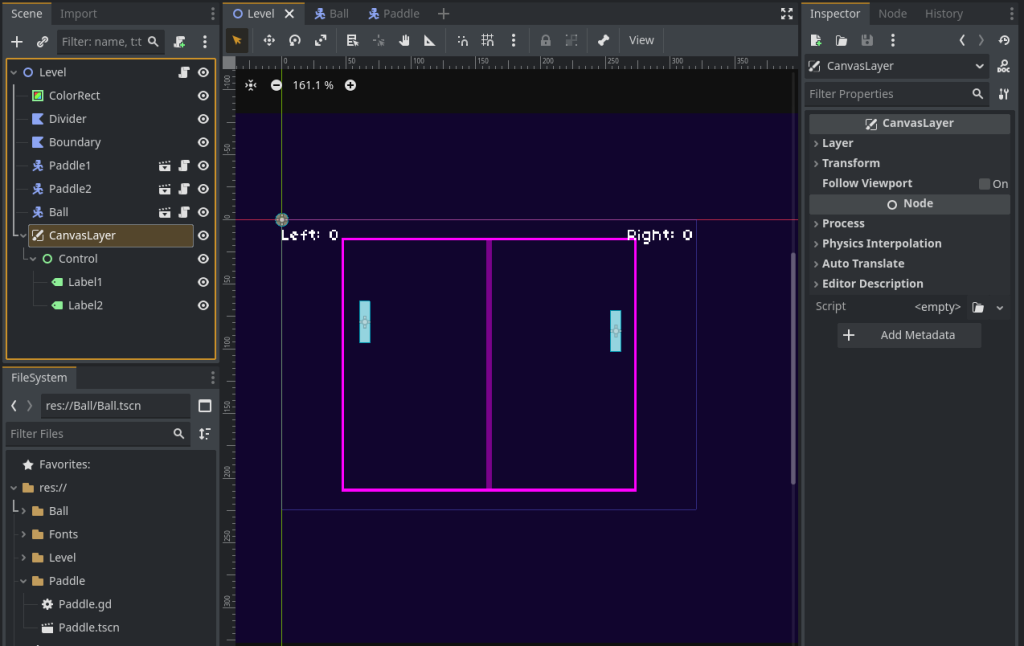
Levelscene, add aCanvasLayernode. This special node creates a separate drawing layer that will always appear on top of your game, which is perfect for user interfaces (UI). - Add a
Controlnode as a child of theCanvasLayer. This is a base node for organizing UI elements. - Add two
Labelnodes as children of theControlnode.- Position one label (
Label1) in the top-left for Player 1’s score. In the Inspector, set its Text property to something like “Left: 0”. - Position the other (
Label2) in the top-right for Player 2. Set its Text to “Right: 0”.
- Position one label (
The Main Game Script
This final script will act as the “director” of our game. Attach a new script named Level.gd to your Level root node.
# FILE: Level/Level.gd
extends Node2D

var score_p1 = 0
var score_p2 = 0

# Get references to our other nodes so we can use them in code.
@onready var ball = $Ball
@onready var label_p1 = $CanvasLayer/Control/Label1
@onready var label_p2 = $CanvasLayer/Control/Label2

# This function runs when the level starts.
func _ready():
	# This is the magic! We tell the Level to listen for the ball's alarm.
	ball.out_of_bounds.connect(_on_ball_out_of_bounds)

	# Start a fresh game
	new_game()

func new_game():
	score_p1 = 0
	score_p2 = 0
	update_score_display()
	ball.start()

# A simple function to keep the text on screen updated.
func update_score_display():
	label_p1.text = "Left: " + str(score_p1)
	label_p2.text = "Right: " + str(score_p2)

# This function runs automatically whenever the ball emits its "out_of_bounds" signal.
func _on_ball_out_of_bounds():
	# Check where the ball was when it went out
	if ball.position.x < get_viewport_rect().size.x / 2:
		# It was on the left side, so player 2 scores
		score_p2 += 1
	else:
		# It was on the right side, so player 1 scores
		score_p1 += 1

	update_score_display()
Code Breakdown:
@onready var...: The@onreadykeyword is a safe way to get a reference to another node. It tells the script to “wait until this node is ready and in the scene before you try to grab it.”ball.out_of_bounds.connect(_on_ball_out_of_bounds): This is the line that connects everything. It says, “Hey Level, when you hear theout_of_boundssignal from theball, I want you to run your_on_ball_out_of_boundsfunction.” This is how we make our nodes talk to each other!
Save your Level scene.
You Did It!
That’s everything! Now go to Project -> Project Settings -> Run (switch back to General tab if you don’t find Run option) and set the Main Scene to your Level.tscn.
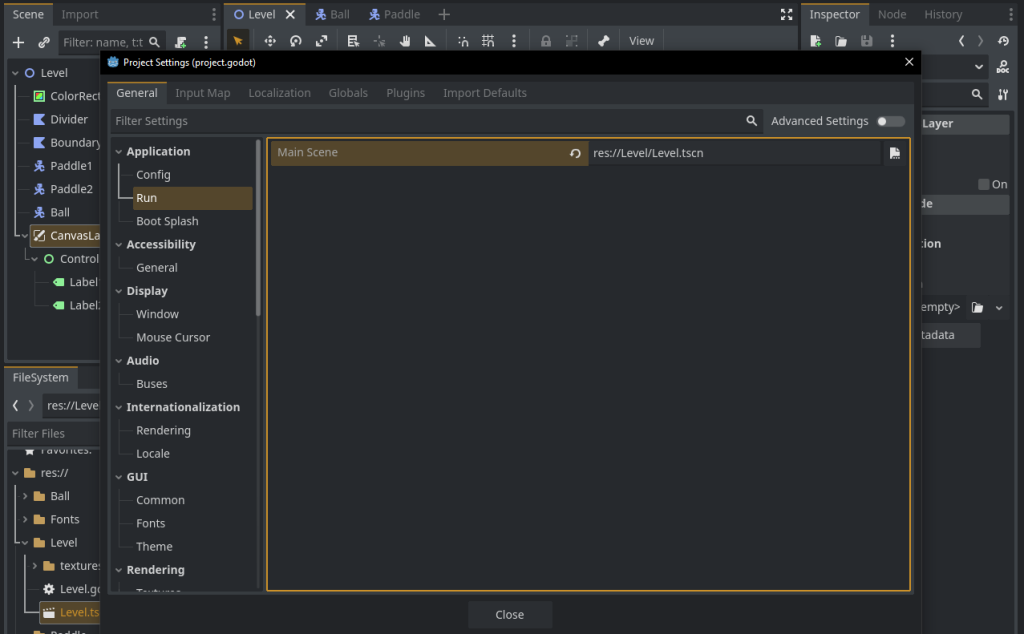
Project -> Project Settings option on top of the editor. Click it and you’ll get this window.Now, press the Play button (F5) at the top right of the editor.
You have built a complete game from scratch! You should be very proud. You’ve learned how to create scenes, control nodes with scripts, use Godot’s physics, create a UI, and use signals to communicate between objects.
You can directly get the completed GitHub project here.
Let me know in comments what you feel! Thank you for reading <3