This is a beginner-level tutorial.
In this tutorial, you will create a Flappy bird game with meee!!! It is a simple game that teaches some fundamentals of gamedev. You should also look at the Pong game tutorial and 3D boat demo later.
Create a Godot Project
Open the Godot Engine and click the “Create” button on top-left. Give your project a name (like “FlappyBird”) and choose a location to save it. Click “Create”.
Once the project is created, we need to change the display resolution to 540×720, before we start creating our game. This is desirable but not necessary. Go to Project > Project Settings in the top menu. In the Display > Window section, set the Viewport Width to 540 and the Viewport Height to 720. Press Close button at the bottom. This will give us a portrait-style game window.
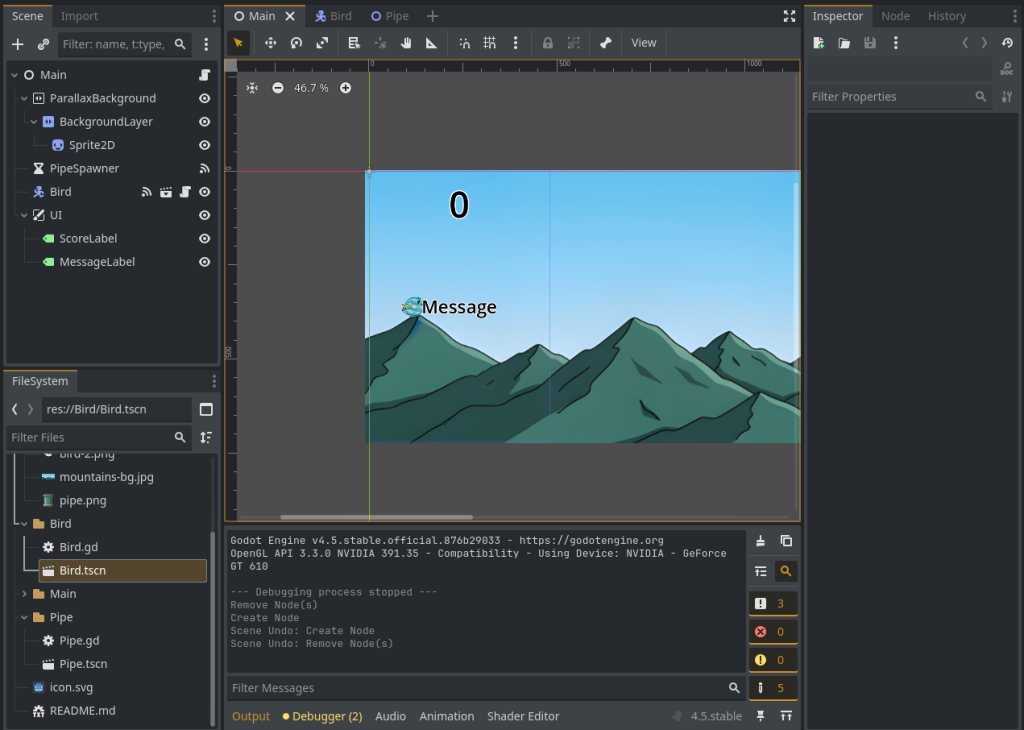
When you open Godot, you’ll see a bunch of panels and windows — don’t panic. We’ll only deal with a few key ones that actually matter for now:
- Scene Dock (Top Left): Shows all the parts (called nodes) that make up your game world.
- FileSystem Dock (Bottom Left): Works like a file explorer for your project — all your assets live here.
- Inspector (Right): Where you tweak properties of whatever node you’ve selected.
- Main View (Center): Your actual window into the 3D world — where the fun happens.
Now we need to organize our project so we can work on it easily. So, in the FileSystem dock (usually on the bottom left), right-click to create a folder, and name it assets. This will be the folder where we will put our images/sprites. Right-click again to create folders named Bird, Pipe, and Main.
Download the assets from here & extract them into your assets folder.
Finally, we need to set-up input actions. Input actions in Godot are named controls (like “jump” or “shoot”) that you define once, and map them to some real keyboard keys/buttons/joystick axes or then use instead of checking for specific keys or buttons directly.
Go to Project > Project Settings and click on the Input Map tab (at the top of the panel).
Find the Add New Action box, and type “flap” in it, then press Enter. Click the “+” icon next to your new “flap” action and press the Spacebar on your keyboard, then click “OK”. This maps the spacebar to our “flap” action.
Creating the Bird
Now, let’s create our player character, the bird.
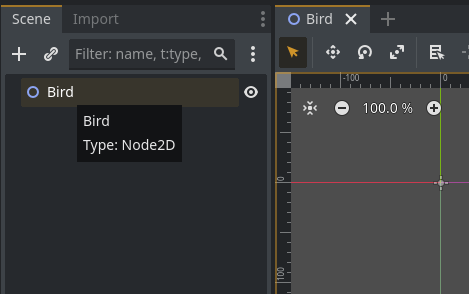
Create the Bird Scene: On File System dock (bottom-left), right-click on the “Bird” folder that we created earlier. Then press Create New -> Scene. Set the scene name to “Bird” and then press Ok. The scene is created HOWEVER, its type is Node2D. You can verify its type by hovering your mouse over the scene’s root node.
But we want our bird to be of a different node type, called CharacterBody2D, because this node is ideal for characters that are controlled by players and need to interact with the physics world. – So right-click the root node (Bird as shown above), and select Change Type option. Then a panel pops up, where you can find CharacterBody2D (hint: use search), select it & press Change button on bottom.
Adding Visuals:
- Right-click on the “Bird” node and add an
AnimatedSprite2Dnode. This node will handle the bird’s animations. - In the Inspector for the
AnimatedSprite2D, under Sprite Frames, click “[empty]” and select “New SpriteFrames”. - Now click this new SpriteFrames resource to open the SpriteFrames panel at the bottom of the screen.
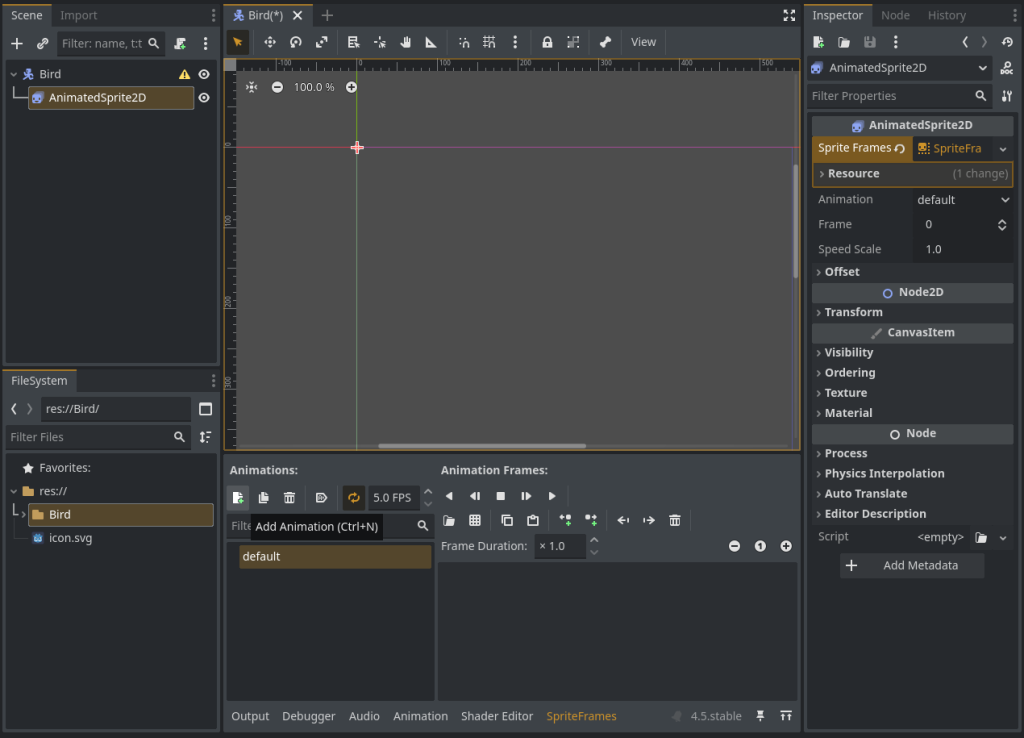
- Press the highlighted icon (Add Animation icon in above image) to create a new animation. Double-click this to rename it into “fall”. Then drag
bird-1.pngfrom File System tab (bottom-left) into the space below “Frame Duration” label. Similarly, create another animation with name “flap” withbird-2.png. - In the Inspector for the AnimatedSprite2D, find the Transform > Scale property and set it to (0.1, 0.1) to make the bird a more appropriate size.
Adding Collision:
- Right-click on the “Bird” node and add a
CollisionShape2D. This defines the bird’s physical shape for collisions. - In the Inspector for the
CollisionShape2D, under Shape, click “[empty]” and select “New CircleShape2D”. Adjust the radius of the circle in the viewport to roughly match the bird’s size.
Writing the Bird’s Script:
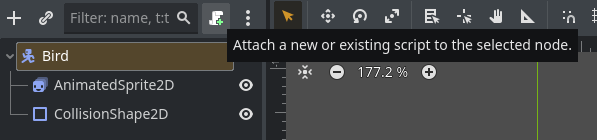
Select the “Bird” node and click the “Attach Script” icon. Save it as Bird.gd in the Bird folder.
Here is the code for the bird. We’ll go through it step by step.
extends CharacterBody2D

# This signal is emitted when the bird collides with something.
signal hit

# The upward force applied when the player "flaps".
const FLAP_FORCE = -425.0

# Get the project's gravity setting so we can apply it.
var gravity = 980 * 1.4

# We need a reference to the AnimatedSprite2D node.
@onready var animated_sprite = $AnimatedSprite2D


func _ready():
	# Start with the "fall" animation when the game begins.
	animated_sprite.play("fall")


func _physics_process(delta):
	# Apply gravity every frame.
	if not is_on_floor():
		velocity.y += gravity * delta

	# Check for the flap input.
	if Input.is_action_just_pressed("flap"):
		velocity.y = FLAP_FORCE
		# Play the "flap" animation once.
		animated_sprite.play("flap")
		# Create a one-shot timer that will call a function after 0.25 seconds.
		# This is connected using a lambda function for a concise solution.
		get_tree().create_timer(0.25).timeout.connect(func(): animated_sprite.play("fall"))


	# Apply the bird's velocity. move_and_slide handles collisions.
	move_and_slide()

	# If a collision occurs, emit the "hit" signal.
	# The get_slide_collision_count() > 0 check is a reliable way to detect this.
	if get_slide_collision_count() > 0:
		hit.emit()


# This function disables the bird's physics process.
func stop():
set_physics_process(false)_physics_process(delta): This function is called every physics frame. We apply gravity to the bird’s vertical velocity (velocity.y). When the “flap” input is pressed, we give the bird an upward velocity. move_and_slide() is a powerful function that moves the bird and handles collisions automatically.
signal hit: We declare a custom signal named “hit”. We emit() this signal whenever move_and_slide() detects a collision. This lets other parts of our game know that the bird has crashed.
Creating the Pipes
Next, we’ll create the pipe obstacles.
Create the Pipe Scene: Create a new scene with a Node2D as the root and name it “Pipe”. Save it as Pipe.tscn in your Pipe folder.
Building the Pipe Collision & Score Detectors:
- Add two Area2D nodes named “PipeTop” and “PipeBottom”. Area2D nodes detect when other objects enter or exit them, which is perfect for detecting a crash without a hard collision.
- Add a CollisionShape2D to each Area2D and give them RectangleShape2D shapes that cover the pipe visuals.
- Add another Area2D named “ScoreArea” and place its CollisionShape2D in the gap between the pipes. This will detect when the bird successfully passes through.
Building the Pipes/Visuals:
- We’ll create a top and a bottom pipe. We are using multiple Sprite2D nodes to create the illusion of a single long pipe. This is done for visual representation.
- Add
Sprite2Dnodes and use the pipe.png texture. Arrange them to form a top and a bottom pipe with a gap in between.
Writing the Pipe’s Script:
- Attach a new script to the “Pipe” root node, saving it as Pipe.gd.
extends Node2D

# Define custom signals that this scene can emit.
signal scored
signal hit

# The speed at which the pipes will move. This will be set by the main scene.
var scroll_speed = 150.0


func _process(delta):
	# Move the pipe to the left based on the scroll speed.
	position.x -= scroll_speed * delta

	# If the pipe moves off-screen, delete it to free up memory.
	if position.x < -150:
		queue_free()


# This function is connected via the editor to the body_entered signal
# of the Area2D nodes for the top and bottom pipes.
func _on_pipe_body_entered(body):
	# When a body enters the pipe's collision shape, we emit the "hit" signal.
	hit.emit()


# This function is connected via the editor to the body_entered signal
# of the ScoreArea Area2D node.
func _on_score_area_body_entered(body):
	# When a body enters the scoring area, we emit the "scored" signal.
	# We also disable the score area's collision to ensure the signal is only
	# sent once per pipe.
	$ScoreArea/CollisionShape2D.set_deferred("disabled", true)
scored.emit()_process(delta): We move the pipe to the left each frame. If it goes off-screen, we use queue_free() to delete it and save memory.
_on_pipe_body_entered and _on_score_area_body_entered: These functions are connected to the body_entered signal of our Area2D nodes. They emit our custom hit or scored signals when the bird enters them.
Connecting Signals in the Editor:
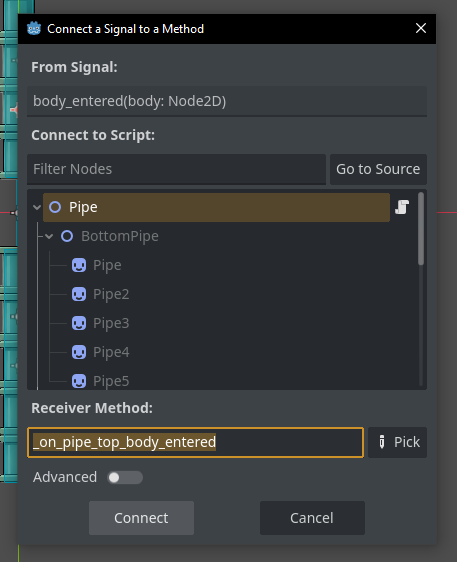
- Select the “PipeTop” Area2D node. In the Node dock (top right), double-click the body_entered signal and connect it to the _on_pipe_body_entered function in the “Pipe” script.
- Do the same for “PipeBottom”, connecting its body_entered signal to the same function.
- Select the “ScoreArea” Area2D and connect its body_entered signal to the _on_score_area_body_entered function.
Connect to connect the signal.PThe Main Scene – Bringing It All Together
This is where we’ll assemble all the pieces and control the game flow.
Create the Main Scene:
- Create a new scene with a
Nodeas the root and name it “Main”. Save it as Main.tscn in the Main folder.
Adding the Background:
- Add a
ParallaxBackgroundnode underMain. This creates a scrolling background effect. - Add a
ParallaxLayeras a child of theParallaxBackground. - Add a
Sprite2Das a child of theParallaxLayerand use themountains-bg.jpgas its texture. In the ParallaxLayer’s Inspector, set Motion > Mirroring to the width of your background image to make it loop seamlessly.

Adding the Bird and Pipe Spawner:
Drag and drop your Bird.tscn from File System to your viewport to add your Bird into the Main scene.
Also add a Timer node and name it “PipeSpawner”. This will be used to spawn pipes at regular intervals. In the Inspector, set its Wait Time to 1.8 seconds and enable Autostart.
Creating the UI:
- Add a
CanvasLayernode. This ensures our UI is always drawn on top of the game. - Add two
Labelnodes as children of theCanvasLayer, named “ScoreLabel” and “MessageLabel”. - Position the “ScoreLabel” at the top-center and the “MessageLabel” in the center of the screen. Adjust their text and font settings in the Inspector.
Writing the Main Script:
Attach a new script to the “Main” node, saving it as Main.gd. This is the most complex script, as it manages the entire game.
extends Node

# --- Scenes ---
@export var pipe_scene: PackedScene

# --- Nodes ---
@onready var bird = $Bird
@onready var pipe_spawner = $PipeSpawner
@onready var parallax_background = $ParallaxBackground
@onready var score_label = $UI/ScoreLabel
@onready var message_label = $UI/MessageLabel

# --- Game Variables ---
var scroll_speed = 150.0
var score = 0

# A simple state machine to manage the game's flow.
enum GameState { READY, PLAYING, GAME_OVER }
var current_state

func _ready():
	# When the game starts, set the state to READY.
	set_state(GameState.READY)

func _process(delta):
	# The parallax background is moved by updating its scroll_offset.
	# This is only done when the game is actively playing.
	if current_state == GameState.PLAYING:
		parallax_background.scroll_offset.x -= scroll_speed * delta

func _unhandled_input(event):
	# This function handles player input based on the current game state.
	if event.is_action_pressed("flap"):
		if current_state == GameState.READY:
			set_state(GameState.PLAYING)
		elif current_state == GameState.GAME_OVER:
			# Reload the entire scene to restart the game.
			get_tree().reload_current_scene()

func set_state(new_state):
	current_state = new_state
	match current_state:
		GameState.READY:
			# Prepare for a new game.
			message_label.text = "Flap to Start"
			message_label.show()
			score = 0
			score_label.text = str(score)
			bird.position = Vector2(120, 360)
			bird.set_physics_process(false) # Keep bird from falling

		GameState.PLAYING:
			# Start the game.
			message_label.hide()
			pipe_spawner.start()
			bird.set_physics_process(true) # Bird can now move

		GameState.GAME_OVER:
			# End the game.
			message_label.text = "Game Over\nFlap to Retry"
			message_label.show()
			pipe_spawner.stop()
			bird.stop()

func _on_pipe_spawner_timeout():
	# This function is called every time the PipeSpawner timer finishes.
	var pipe = pipe_scene.instantiate()

	# Set a random vertical position for the new pipe.
	pipe.position = Vector2(550, randi_range(250, 600))
	pipe.scroll_speed = scroll_speed

	# Connect to the pipe's custom signals.
	pipe.hit.connect(_on_pipe_hit)
	pipe.scored.connect(_on_pipe_scored)

	add_child(pipe)

func _on_pipe_hit():
	# If a pipe's "hit" signal is received, end the game.
	set_state(GameState.GAME_OVER)

func _on_pipe_scored():
	# If a pipe's "scored" signal is received, update the score.
	score += 1
	score_label.text = str(score)

	# Difficulty Scaling: Every 5 points, increase the speed.
	if score % 5 == 0:
		scroll_speed += 10.0

func _on_bird_hit():
	# This is connected to the bird's "hit" signal.
	# If the bird hits anything (like the ground), end the game.
set_state(GameState.GAME_OVER)@export var pipe_scene: PackedScene: This exports a variable to the Inspector, allowing us to assign our Pipe.tscn to it.
Game State Machine: We use an enum to create three game states: READY, PLAYING, and GAME_OVER. The set_state function handles the logic for switching between these states (e.g., starting timers, showing messages).
_on_pipe_spawner_timeout: This function is called when the PipeSpawner timer finishes. It creates a new pipe instance, gives it a random height, and connects its hit and scored signals to functions in this script.
Connecting Nodes and Scenes:
- Select the “Main” node. In the Inspector, drag Pipe.tscn from the FileSystem to the Pipe Scene property.
- Connect the PipeSpawner’s timeout signal to the _on_pipe_spawner_timeout function.
- Connect the Bird’s hit signal to the _on_bird_hit function.
Final Touches
Set the Main Scene: Go to Project > Project Settings and under the Application > Run section, set the Main Scene to your Main.tscn.
Run the Game: Press the “Play” button (F5) in the top right corner.
You should now have a complete, working Flappy Bird game! You can flap with the spacebar, score points by flying through pipes, and restart the game after you crash. From here, you can experiment with changing the values, adding new features like sounds, or improving the graphics. Good luck
Get the completed project on GitHub. Thank you so much for reading <3 Let me know how you feel in the comments!