Download source code from GitHub. This article is a breakdown for understanding, and not all code is written here. – This tutorial assumes that you are familiar with GDScript & Godot in general.
I took inspiration from Need for Speed 2, an old game. The game will have 2 or 3 levels, with a single track in each level where cars can drive or race. For each player, there will be a timer that triggers at the start & will end when all the laps have been covered. Finally, the player with smallest time will be the winner. We will display the results on screen after the race and then go back to menu.
Lets continue the tutorial now. First of all we need vehicles!
We NEED vehicles!
Vehicles have a body and some tires. Front tires are for steering and rear for acceleration/thrust. Vehicles somehow have physics applied on them.
Luckily, Godot 4 provides a built-in vehicle physics class with all of what we need.
In Godot, create a VehicleBody3D node and give it a collision shape. Make 4 VehicleWheel3D children nodes and check forward types for ‘steering’ and rear types for ‘engine thrust/force’. Also add mesh instances to all these to visualize our car.
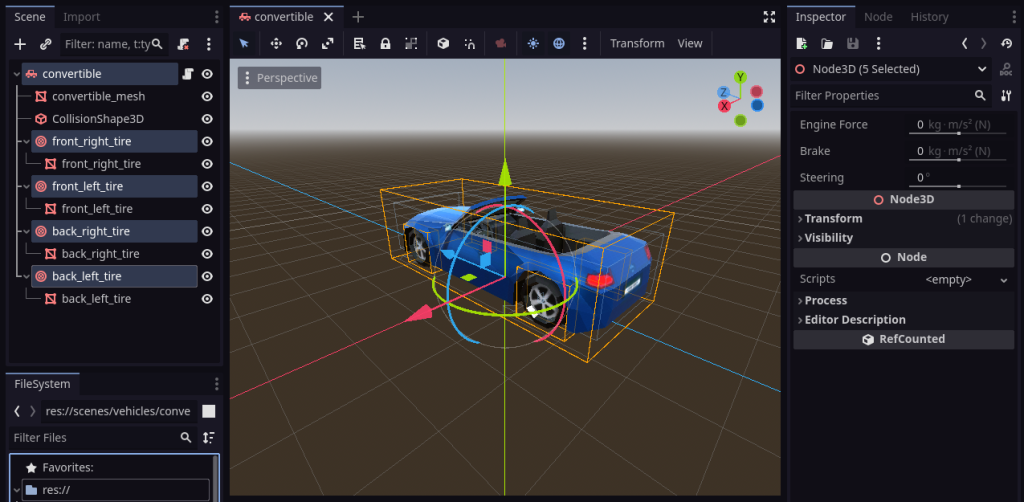
But since we have to store more details than what Godot provides, such as max steering, max engine power and so on; I extended VehicleBody3D class in Godot to make my own: (attach this script to vehicle root).
extends VehicleBody3D
class_name Vehicle3D


@export var vehicle_name: String = 'Vehicle'
@export var max_steering_angle: float = 0.5 # radians
@export var max_engine_force: float = 800 # max_engine_force
@export var max_brake: float = 10 # max_engine_force


func _ready():
	self.add_to_group("vehicles")


func acclerate(amount: float):
	engine_force = amount


func steer(angle: float):
	steering = angle


func apply_brake(amount: float):
	brake = amount


# >
# >
# >


# must reset values after user has stopped pushing acclerate pedal
func reset_vehicle_controls(delta):
	engine_force = 0
	steering = lerp(steering, 0.0, 10.0 * delta)
	brake = 0
See how vehicle exposes accelerate(), apply_break() and other such methods as an API.
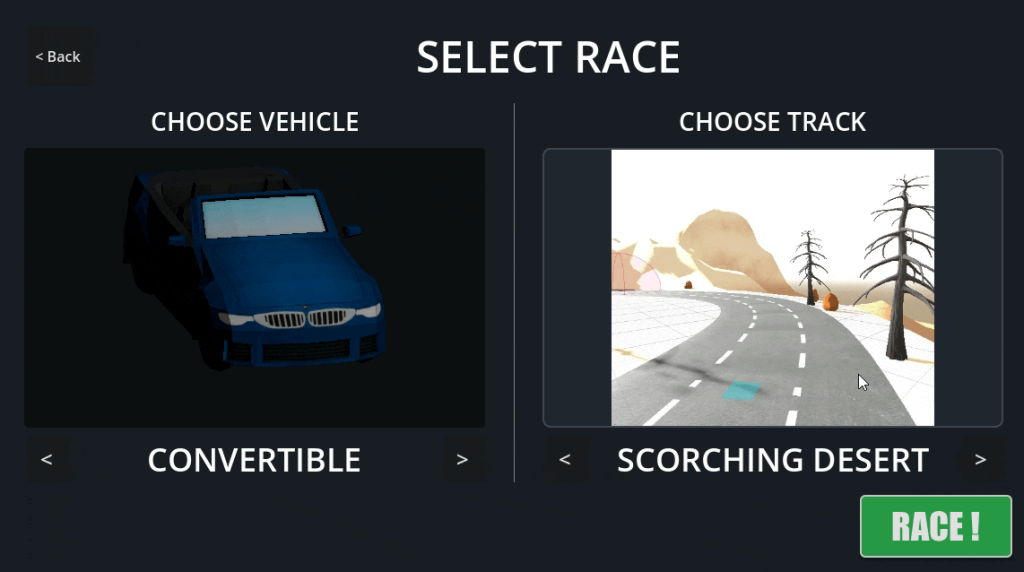
For any kind of vehicle, we just have to create a scene and apply the same script to it.
Who will control vehicles?
Players.
Player is a class that has access to one vehicle. However, there can be multiple sources of player input; from keyboard on same PC or from network or from AI-calculations… So we have to extend this class for each kind of player:
- human player: Player’s child class for keyboard/mouse input
- network player: for multiplayer server-based commands
- AI player: calculates what to do based on AI calculations.
Anyway, Player base class keeps track of current lap, time since start of race, total distance traveled and whether or not race is finished by this player (have completed all laps). It also has methods to update these values every frame. Player base class still doesn’t exactly controls the child vehicle class, as it will later be controlled by either HumanPlayer or NetworkPlayer.
So lets make a base player script (player.gd):
# RULE: PLAYER MUST BE A PARENT OF 1 VEGICLE

extends Node
class_name Player

var lap: int = 0
var timer: float = 0.0
var finished: bool = false
var distance_traveled: float = 0.0

@export var vehicle: Vehicle3D


# Constructor for the scene
func with_data(_vehicle: Vehicle3D) -> Player:
	set_vehicle(_vehicle)
	return self # IMPORTANT


func set_vehicle(_vehicle: Vehicle3D):
	if vehicle: # if it already attached
		remove_child(vehicle) # Remove it else 2 vehicles will be there in level
	self.vehicle = _vehicle
	self.add_child(_vehicle)


func get_vehicle():
	return self.vehicle


# when added to scene tree
func _ready():
	self.add_to_group("players") # all Player instances


func _physics_process(delta):
	update_distance_traveled()
	update_timer(delta)


func _process(delta):
	pass


# Total distance traveled by the vehicle (will be helpful later)
var _last_player_position: Vector3 = Vector3.ZERO #tmp
func update_distance_traveled():
	# find length to vector between last and current position
	var distance = vehicle.position.distance_to(_last_player_position)
	_last_player_position = vehicle.position # update last position
	distance_traveled += distance


func get_distance_traveled():
	return distance_traveled


func update_timer(delta: float):
	if not finished:
		timer += delta


func next_lap():
	if not finished:
		lap += 1
		print("debug: lap " + str(lap))
This base script manages important things about any player, such as its vehicle’s total distance traveled and time since race start. This will be handy as the player having least time is the winner after it has completed all its laps. The distance calculation is required because lap is updated only after player has at least covered the distance of the road; thus not helping those who take shortcuts.
However, for fair lap calculation, a more better approach would be to place checkpoint Marker3D nodes along the road, and unless player has passed near most of the checkpoints, only then consider the lap to be valid. But I am too lazy to do this since the previous approach kind-of works for me and is easier.
Making a human player
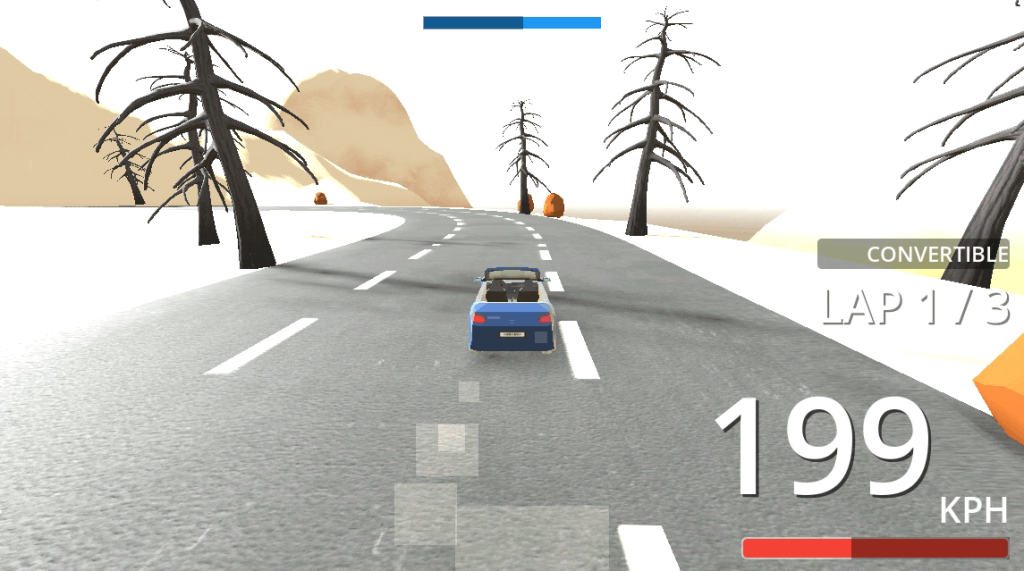
Human players have a camera attached to them to view the world. It also takes input events and calls appropriate vehicle methods.
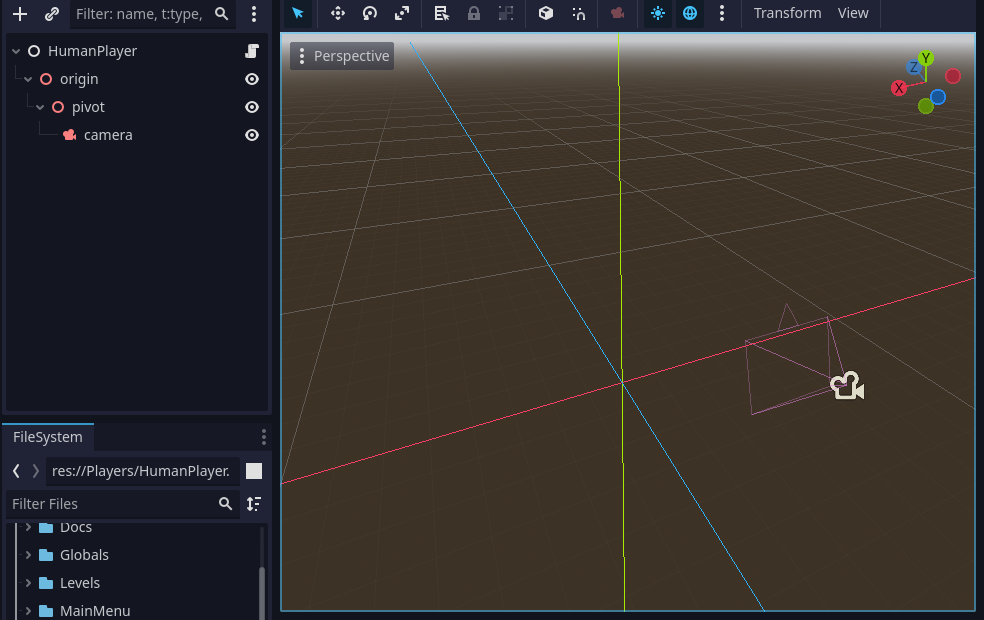
HumanPlayer scene has GTA-San like camera that revolves around player. It is made a simple Node3D setup where an origin is placed on center and a pivot is moved to one side; and Camera3D is child of pivot. When we rotate origin in code, the while pivot arm gets rotated.
# Origin rotates along y-axis for revolving motion
# Pivot rotates along x-axis for up/down motion
# Mouse captured is required, so pressing 'esc' will capture mouse
func _input(event):

	if Input.is_action_just_pressed("ui_cancel"):
		if Input.get_mouse_mode() == Input.MOUSE_MODE_CAPTURED:
			Input.set_mouse_mode(Input.MOUSE_MODE_VISIBLE)
		else:
			Input.set_mouse_mode(Input.MOUSE_MODE_CAPTURED)

	if event is InputEventMouseMotion and Input.get_mouse_mode() == Input.MOUSE_MODE_CAPTURED:
		var mouse_delta = event.relative
		$origin.rotate_y(deg_to_rad(-mouse_delta.x * 0.2))
		$origin/pivot.rotate_x(deg_to_rad(mouse_delta.y * 0.2))
The rest of human-player is a controller script; mapping inputs to vehicle functions.
extends Player
class_name HumanPlayer

var player_ui: Node

var _is_moving_fast: bool = false


func _ready():
	super() # Call base class's _ready()
	player_ui = SceneManager.load_scene("res://Players/UI/PlayerUI.tscn")
	player_ui.visible = false # initially invisible
	add_child(player_ui)

	$origin.global_transform.origin = vehicle.global_transform.origin

	# rotate orogin so camera is behind vehicle - get vehicle's -z axis
	$origin.rotation.y = vehicle.rotation.y


func _physics_process(delta):
	super(delta) # Call super class's _physics_process()
	# follow vehicle
	$origin.global_transform.origin = vehicle.global_transform.origin

	# reset accelreation, brake, steering
	vehicle.reset_vehicle_controls(delta)

	if vehicle.get_linear_velocity().length() > 0.3:
		_is_moving_fast = true
	else:
		_is_moving_fast = false

	if Input.is_action_pressed("forward"):
		vehicle.acclerate(vehicle.max_engine_force)

	if Input.is_action_pressed("back"):
		vehicle.acclerate(-vehicle.max_engine_force)

	if Input.is_action_pressed("right"):
		vehicle.steer(
			lerp(vehicle.steering, -vehicle.max_steering_angle, 25.0 * delta / (1+(vehicle.get_linear_velocity().length() / 50)))
			)

	if Input.is_action_pressed("left"):
		vehicle.steer(
			lerp(vehicle.steering, vehicle.max_steering_angle, 25.0 * delta / (1+(vehicle.get_linear_velocity().length() / 50)))
		)
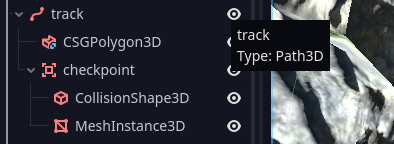
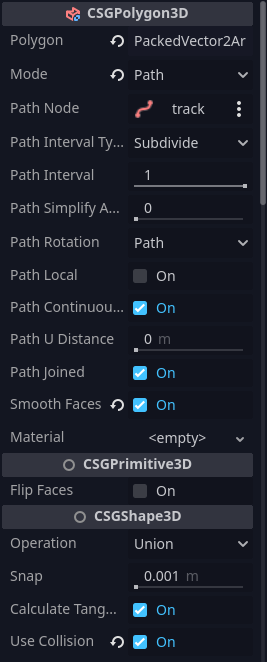
Making a level
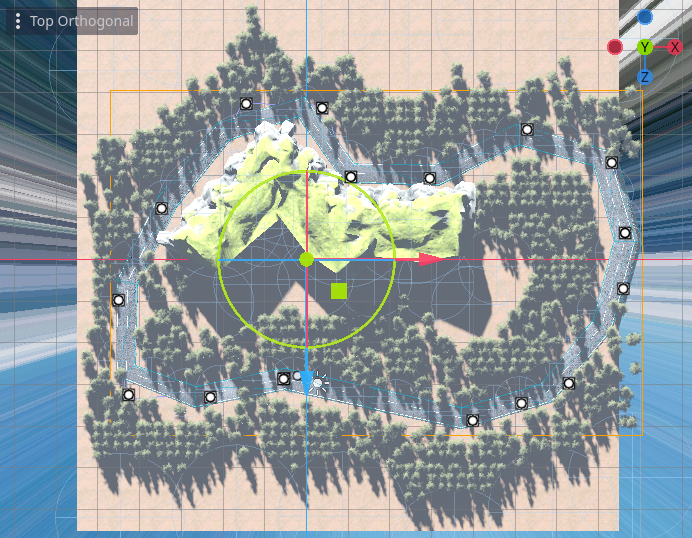
The only useful thing in level is the road. Rest is cosmetic. The road is made as a Path3D node. It has a child CSGPolygon3D node that defines the shape of road’s cross-section. This cross-section is extruded based on path, when we set the csg-polygon’s mode to path and assign it a path. Scene looks like this:
Here is how a simple level looks like when we apply a sky panorama texture, trees are planed using multi-mesh instance in places except road (see how on appendix 1 below) on a flat plane; flat plane having a good dirt texture. And road is given a texture as well. Some cliffs are added for variation on side.

Making AI player
Now, we need to make AI player that can drive itself on the road. Earlier, we used Path3D & it is going to be handy now. The core concept of AI racing player is to get the next point in the path/road and move towards it using the same vehicle methods.
# AIPlayer keeps itself alighed with the track. Track dependenciy is
# resolved by Level.gd during AIPlayer's initialization.

extends Player
class_name AIPlayer


var track: Path3D

func set_track(_track: Path3D):
	track = _track
	return self


func _ready():
	super()


func _process(delta):
	super(delta)


func _physics_process(delta):
	super(delta)

	follow_direction(
		get_nearest_direction(track.curve, vehicle.global_transform.origin)
		 + (track.curve.get_closest_point(vehicle.global_transform.origin) - vehicle.global_transform.origin).normalized() / 4.0
		)

	if not (vehicle.steering > 0.3 or vehicle.steering < -0.3):
		vehicle.acclerate(vehicle.max_engine_force * 1.3)
	else:
		vehicle.acclerate(vehicle.max_engine_force / 4)


func get_nearest_direction(curve : Curve3D, point : Vector3) -> Vector3:
	var offset := curve.get_closest_offset( point )
	var point_1 := curve.sample_baked( offset, true )
	var point_2 := curve.sample_baked( offset + 0.5, true )
	var direction : Vector3 = ( point_2 - point_1 ).normalized()
	return direction


func follow_direction(direction: Vector3):
	var steering_target = vehicle.global_transform.origin + direction
	var fwd = vehicle.linear_velocity.normalized()
	var target_vector = (steering_target - vehicle.global_transform.origin)
	vehicle.steering = fwd.cross(target_vector.normalized()).y
In above code, follow_direction() handles the steering. It steers towards the next point on the road/track. And in _physics_process(), it calls accelerate function. Don’t be confused about the if statement there; it just accelerates a bit less if steering is too much rotated to prevent vehicle toppling over.
Spawning vehicles
In Level, we have to spawn vehicles on correct positions on road. I used Marker3D nodes to store the positions of initial starting points. These nodes are added to group “spawn_points”.
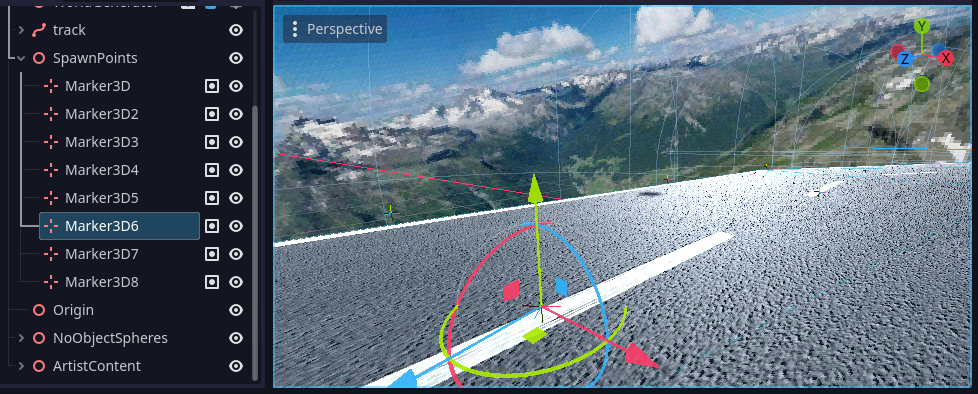
In script Level.gd:
# call this in _ready()

# _players can be populated either by the main-menu scene
# when number of players are selected; or more cleanly by
# using get_tree().get_nodes_in_group("players"), since
# all players automatically are inserted to 'players' group
var player: Array[Player]

func spawn_players():
	var index: int = 0
	for player in _players:
		player.vehicle.position = get_tree().get_nodes_in_group("spawn_points")[index].global_position
		player.vehicle.look_at_from_position(player.vehicle.position, player.vehicle.position - get_track_direction(checkpoint.global_position), Vector3.UP)

		if player is AIPlayer:
			player.set_track(track)
		add_child(player)

		index += 1

# To make sure cars face correct direction on road.
func get_track_direction(at_position: Vector3):
	var offset := track.curve.get_closest_offset( at_position )
	var point_1 := track.curve.sample_baked( offset, true )
	var point_2 := track.curve.sample_baked( offset + 0.5, true )
	var direction : Vector3 = ( point_2 - point_1 ).normalized()
return directionCalculating winner
Earlier, we added a timer to each player. And laps are also updated for every player if it satisfies the criteria (which is minimum distance traveled must be equal to the total road/track/curve distance).
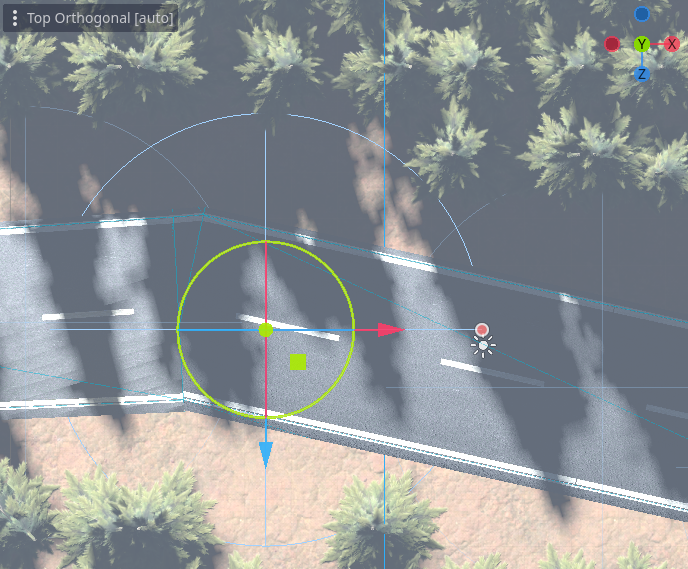
Now to update laps & calculate the winner, Level script keeps track of laps covered by all the players whenever player enters checkpoint region. Checkpoint is an Area3D and its signal _on_body_entered is connected so whenever vehicles enter it, the player lap update caode is called & winner check is also made.
By accessing _players[index].lap and comparing it to total_laps variable in Level.gd. If any vehicle.laps >= total_laps then vehicle.finished = true.
func _on_checkpoint_body_entered(body):
	if not (body is Vehicle3D): return
	var player := body.get_parent() as Player

	if (player.get_distance_traveled() / (player.lap + 1)) >= 0.88 * get_track_length():
			player.next_lap()
			if player.lap >= _number_laps:
				player.finished = true

func get_track_length():
return track.curve.get_baked_length()After winning
When a player finishes a race (player.finished == true), then anything can be done such as showing of a UI panel with all players displayed in order of their winning timer. More can be done, depending on the game.
Future enhancements
Network player for Multiplayer
Original version of the code had successfully implemented multiplayer via HTTP protocol. That sounds crazy since real-time games are not made with HTTP; but this was a crazy idea that I still used regardless. However, I later dropped multiplayer support.
But you can develop it using Godot’s RPC system by making a module to synchronize the player data across devices; as an exercise.
Completing the game and making it production-ready
The current implementation is an abandoned project so I did not focus on UI, multiple levels, more competitive mechanics, dust particle effects and so on. In short the project will probably be completed later if I get more time.
You can play with it, extend it and make your own game based on it.
Appendix 1
How are trees not placed on the road but everywhere around it
The main idea is to spawn only if object position lies outside the Area3D. But since it is no easy way to check if a point lies inside Area3D, I relied on more crude approach; which is, that I used a lot of sphere-shaped CollisionShape3D nodes and checked if a point within any of them (using the simple math test of checking if a point lies in a sphere). If object position lies within none of them ,then spawn the object else discard it (code below).
func place_objects(mesh: Mesh):

	# Create a MultiMeshInstance3D for rocks in the chunk
	var object_multimesh = MultiMeshInstance3D.new()
	object_multimesh.name = object_class_name
	var multimesh = MultiMesh.new()
	object_multimesh.multimesh = multimesh
	multimesh.transform_format = MultiMesh.TRANSFORM_3D
	multimesh.mesh = mesh

	var instance_transforms = []

    # I used chunk based procedural terrain, so object positions are
    # calculated via chunk xz size. But you can use your custom logic
    # for your game use case
    var object_position := calculate_object_position_in_chunk()

    if not is_point_inside_any_no_object_sphere(object_position):
        instance_transforms.append(Transform3D(Basis(), object_multimesh))

	multimesh.instance_count = instance_transforms.size()
	for i in range(instance_transforms.size()):
		multimesh.set_instance_transform(i, instance_transforms[i])

	add_child(object_multimesh)


# Is tree inside area or not (so whether to spawn it or not)
func is_point_inside_any_no_object_sphere(point_global_position: Vector3) -> bool:
	for collision_shape in get_parent().get_node("NoObjectSpheres").get_children():
		if collision_shape is CollisionShape3D:
			var shap = collision_shape.shape
			if shap is SphereShape3D:
				# Use local position for accuracy if collision shape is a child node
				var dist = point_global_position.distance_to(collision_shape.position)
				if dist <= shap.radius:
					return true
return falseAppendix 2
How to make branching roads instead of a single circuit
The whole tutorial assumes a single road/circuit. A good approach for branching roads could be a custom Graph node instead of Path node. The graph node can be developed using multiple Path3D nodes under the hood. And for lap calculation, we can use Djkstra or A* algorithm to find the shortest path between two points & if player has at least covered shortest distance on the circuit, then update the lap.
The above method is cumbersome; so using checkpoint Marker3D nodes is probably an easier approach, and it makes lap logic independent of road logic.
Thank you for reading <3 You can share your thoughts in the comments.