We have two approaches to navigation for our godot RTS game, one using Godot’s built-in navigation system and other using our custom navigation system. In the game, I will be using the custom navigation system for path finding as its more flexible, but discussing Godot’s navigation system will still be helpful & sufficient for many games.
Godot Navigation System 3D
- We have a 3D space for agents to move around. This space is represented by
NavigationRegion3D. It is like a graph for the path-finding algorithm to operate on.- It is a graph internally.
- We have an agent who can move around in the navigation space. These agents use shortest path algorithm through
NavigationAgent3Dnode to navigate theNavigationRegion3Dspace.- It is A-star algorithm implementation internally that runs on that graph.
Basically, the above mentioned nodes are high-level APIs. They are based on low-level API provided by NavigationServer3D in Godot.
Level Scene Setup
Create a scene whose root node is NavigationRegion3D. Select the root node & in the inspector, create a new navigation_mesh. NavigationMesh define the space which can be walked and the obstacles which are impassable. It has many properties to control different things. Details of all the properties can be found in Godot docs here.
Now, create a child MeshInstance3D node. Assign it a box mesh or plane mesh. It is going to be used as a floor to walk agents on.
Also create a StaticBody3D (with a collision shape) so the floor we created above becomes a real physics-based surface.
Now press “Bake NavigationMesh” button on the top. The button appears when you select the root NavigationRegion3D node. This is how the scene should look like:
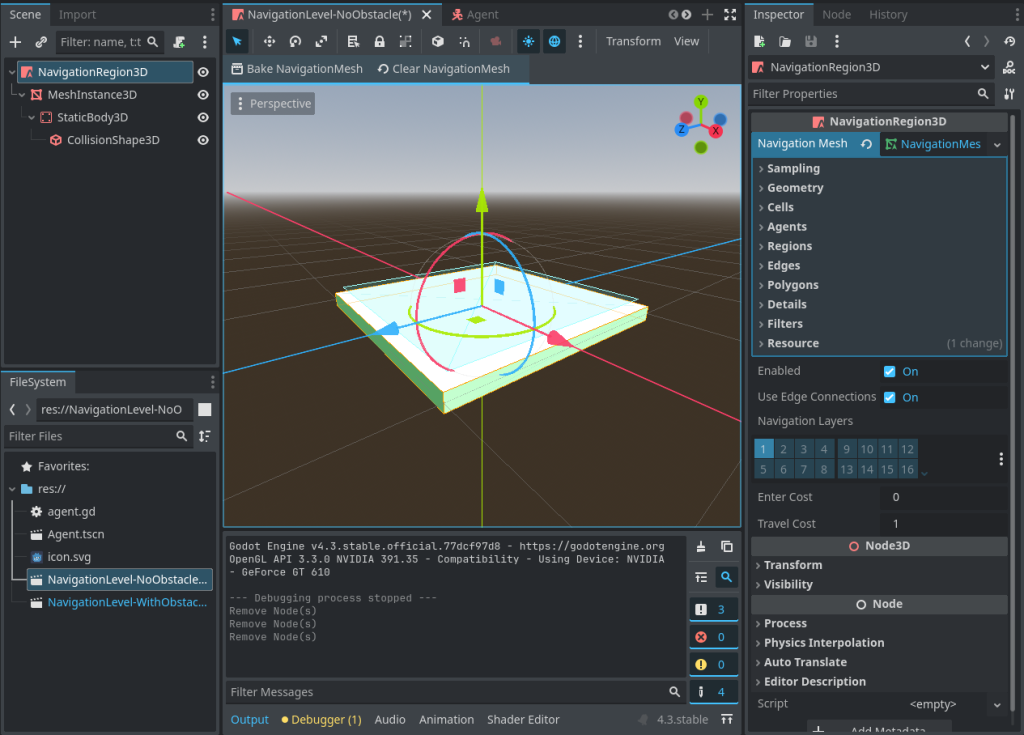
We have successfully created a 3D traversable space for our agent to walk on. But we did not create any agent so far. So lets create it.
Creating Agent that Walks
Create an agent scene. The root node should be CharacterBody3D. Under the root, create MeshInstance3D, CollisionShape3D & NavigationAgent3D node as its children. Also attach a script to the root. This is how the scene looks like:
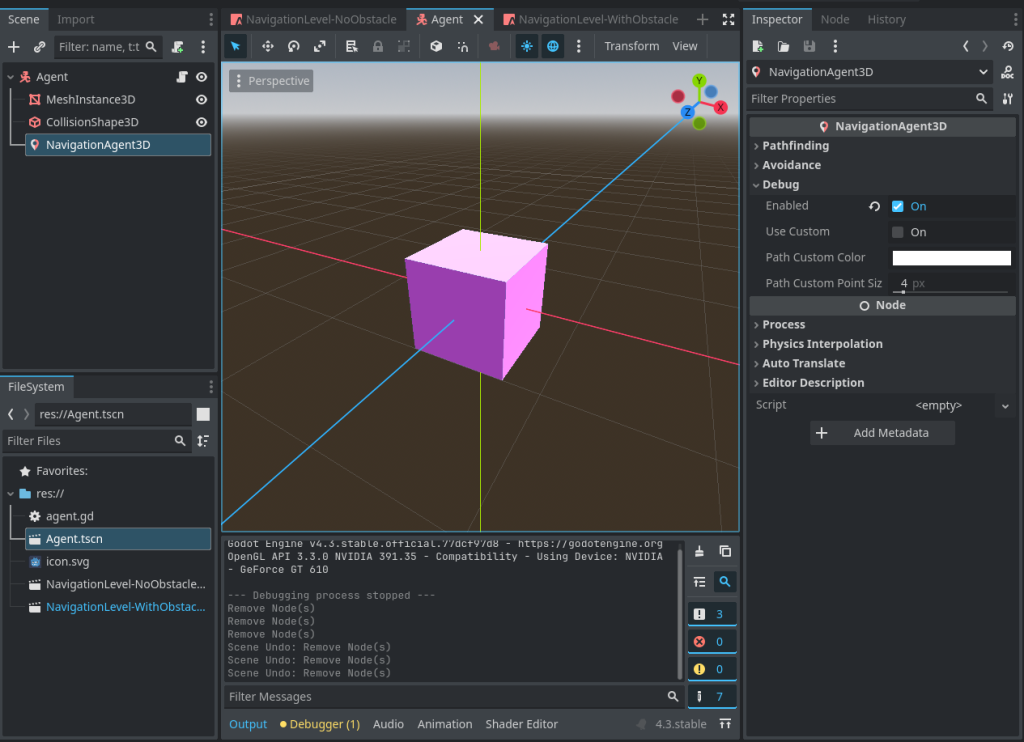
In the script, write following code:
extends CharacterBody3D

@onready var navigation_agent_3d: NavigationAgent3D = $NavigationAgent3D
@export var speed: float = 4

func _physics_process(delta: float) -> void:

	if Input.is_action_just_pressed("ui_home"):
		var target_pos: Vector3
		target_pos.x = randf_range(-5.0, 5.0)
		target_pos.z = randf_range(-5.0, 5.0)
		navigation_agent_3d.set_target_position(target_pos)

	var next_waypoint = navigation_agent_3d.get_next_path_position()
	var vector_to_next_waypoint = next_waypoint - global_position
	var direction = vector_to_next_waypoint.normalized()
	velocity = direction * speed
	move_and_slide()
In above code, the navigation_agent_3d is used to calculate shortest path to the random destination. Then we get the next waypoint (next immediate point) in the path to move towards, until we reach the destination. For real game, you will enter the correct destination to move the agent to. In our RTS tutorial, we will use RaycastSystem to get the position to the destination point, and the agent will move in that direction.
In the level scene, instance this Agent as a child scene. This is how the overall result should look like:
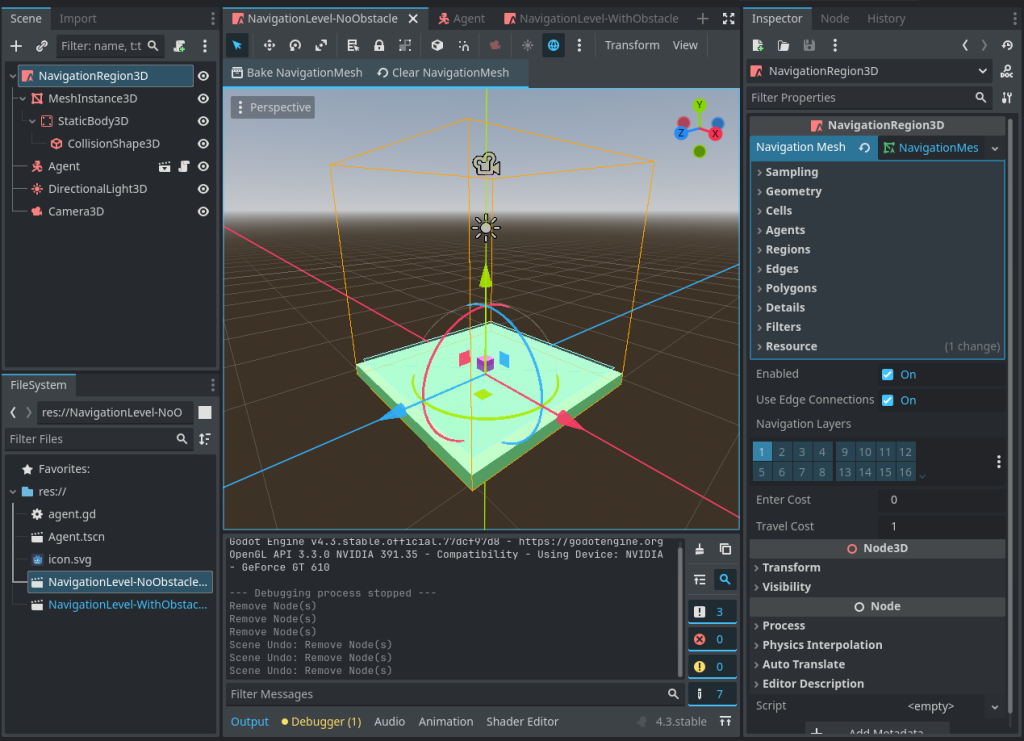
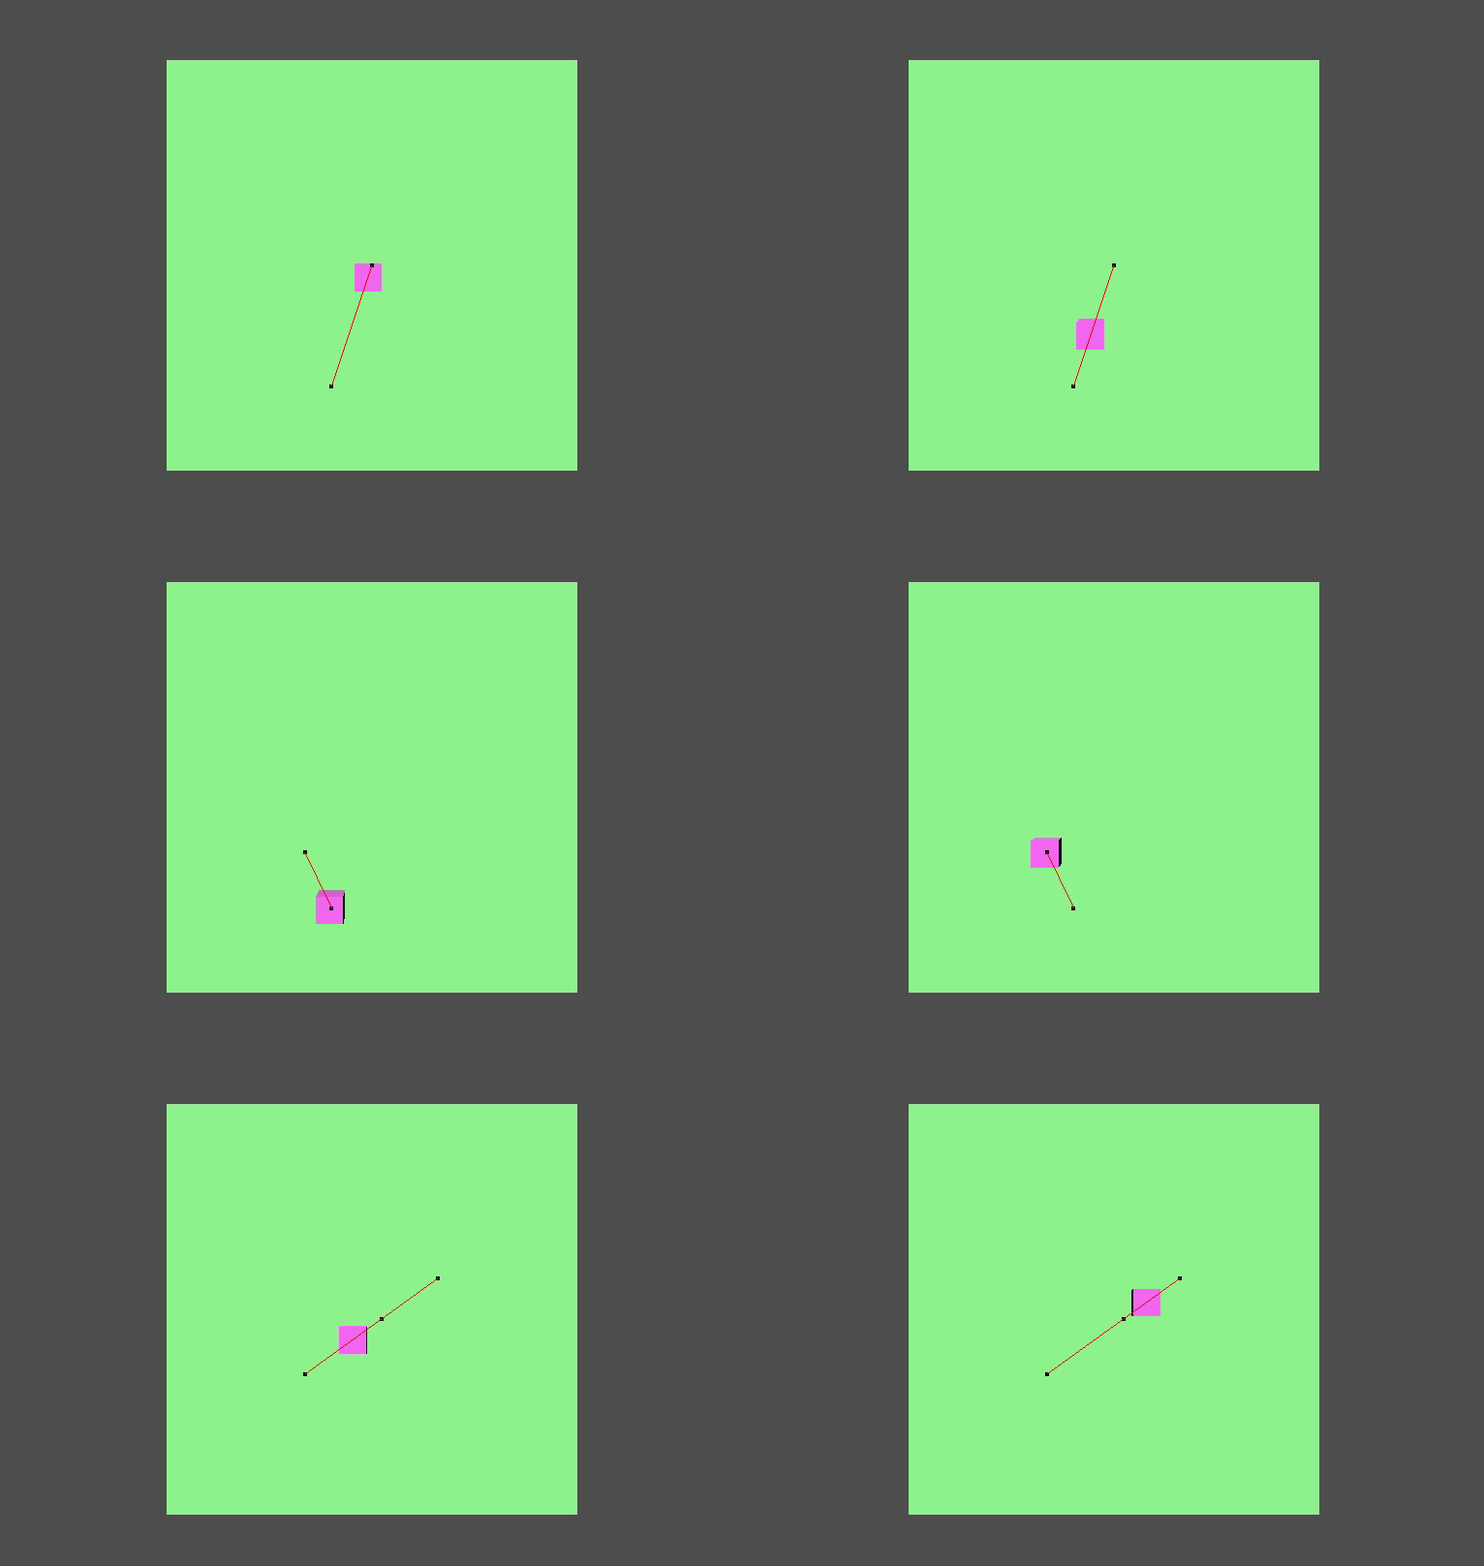
DirectionalLight3D as well in above scene.When you run the above scene, it looks like this:
Adding Obstacles
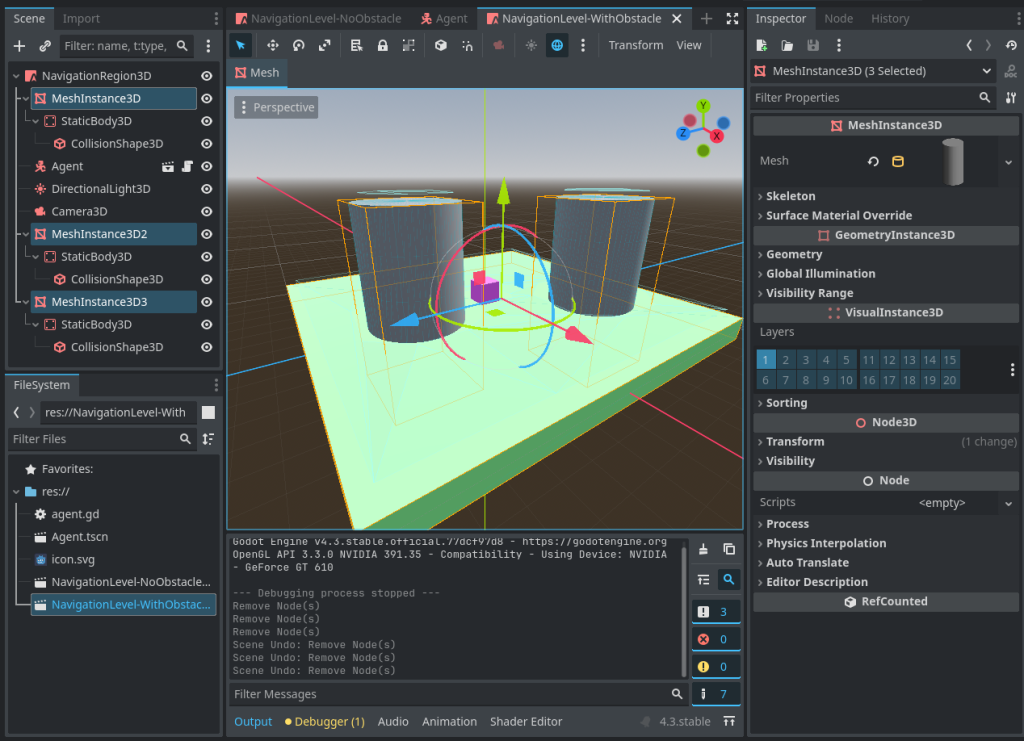
We baked the NavigationRegion3D without any obstacles. But if we want to introduce any obstacles, we need to add other objects as well in the scene and bake again. In below example, I added 2 cylinders (each having a StaticBody3D with them), and baked the NavigationRegion3D again. Here is how it look like:
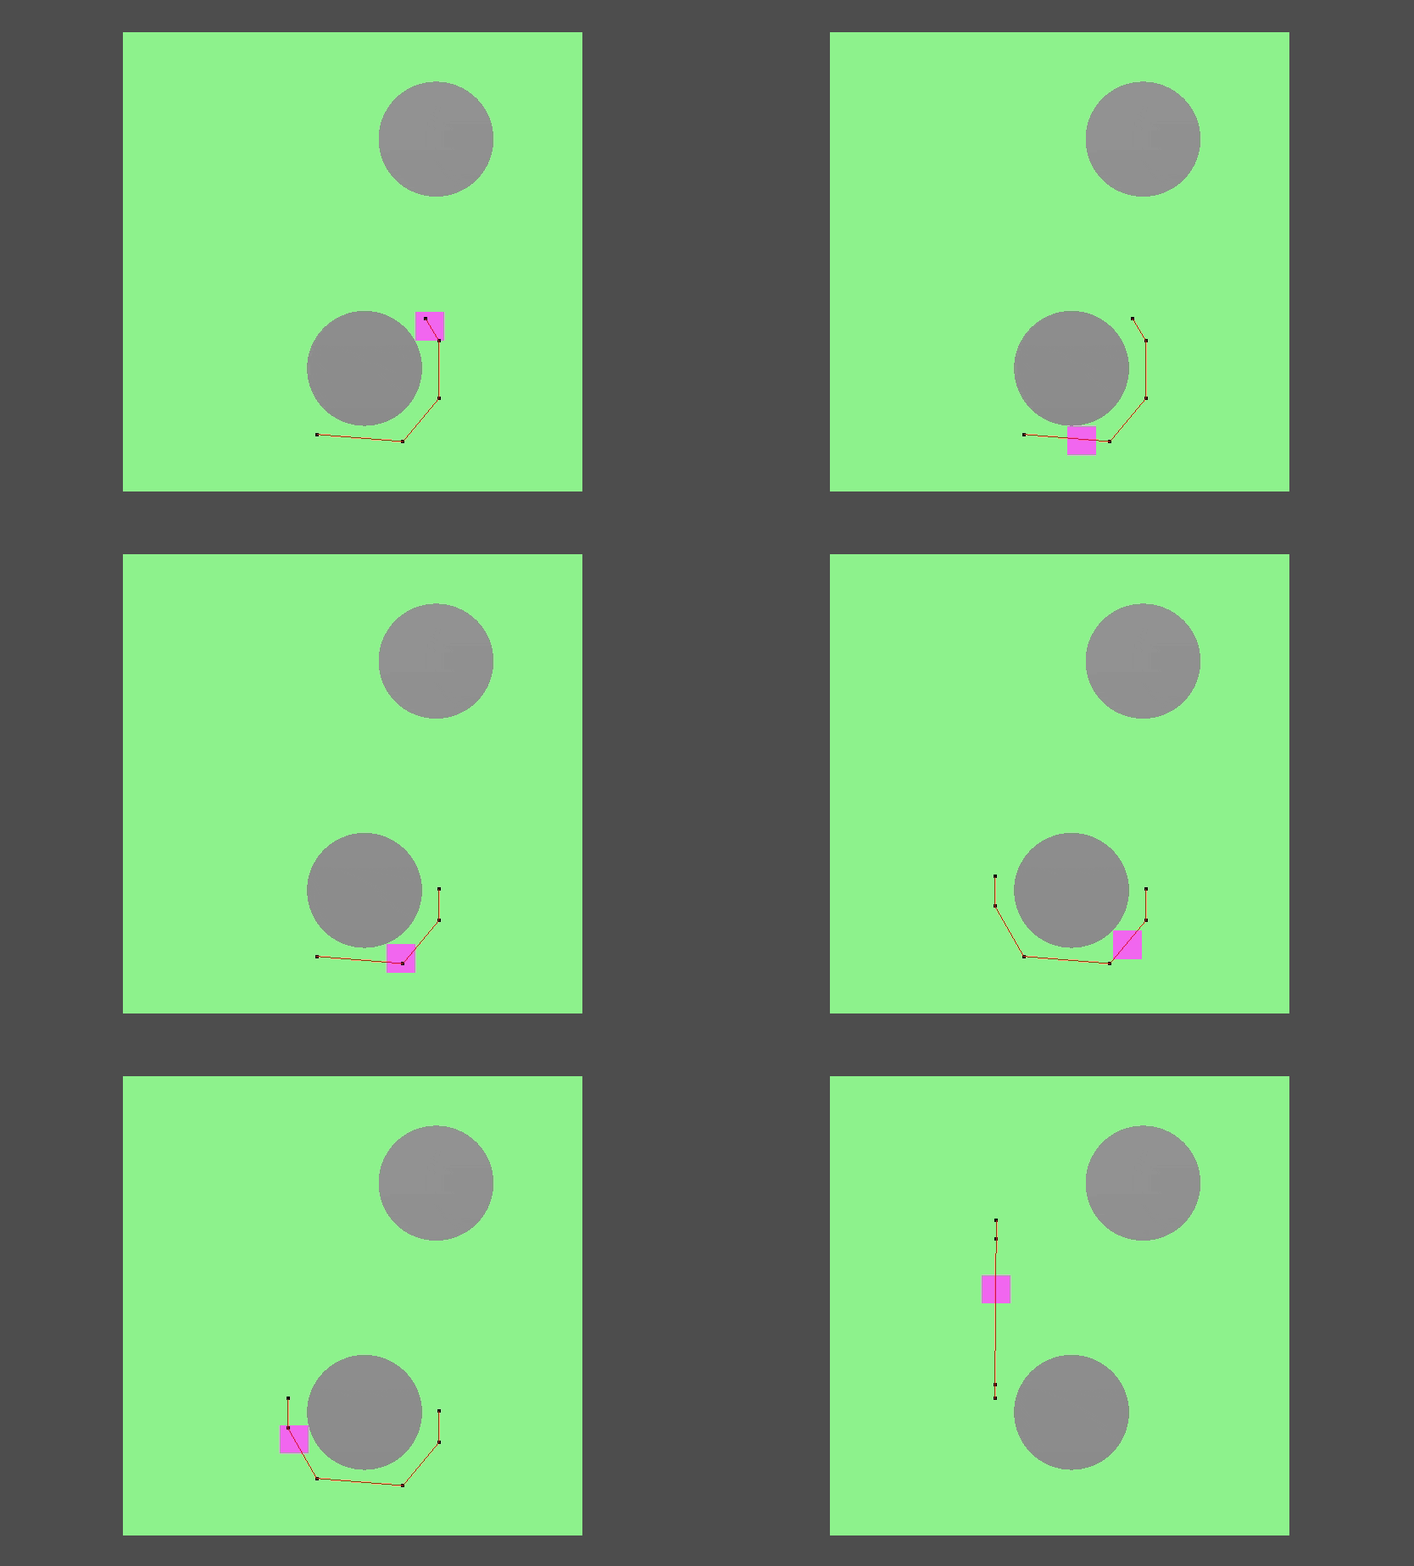
Now the pathfinding looks like this:
More Controls
The above is the very basic navigation system tutorial to get you started. You can explore more, depending on your use cases. In our RTS game, I used a-star algorithm directly on a custom graph. I found it to be more a more flexible approach.
Thank you for reading <3
