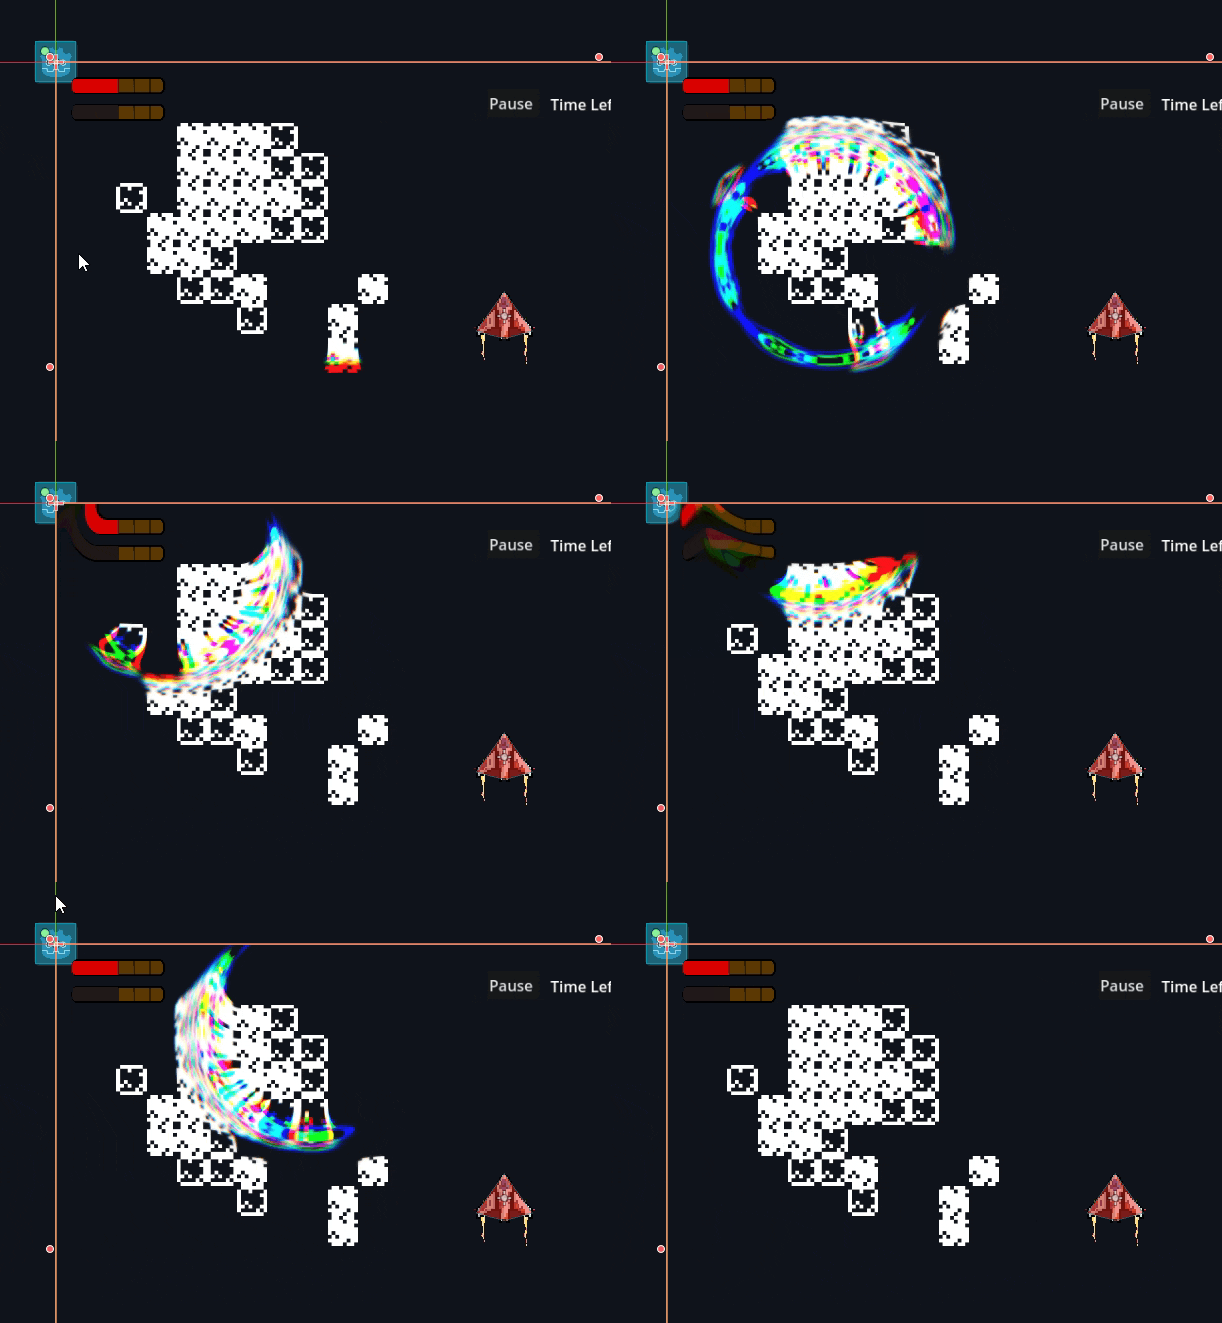
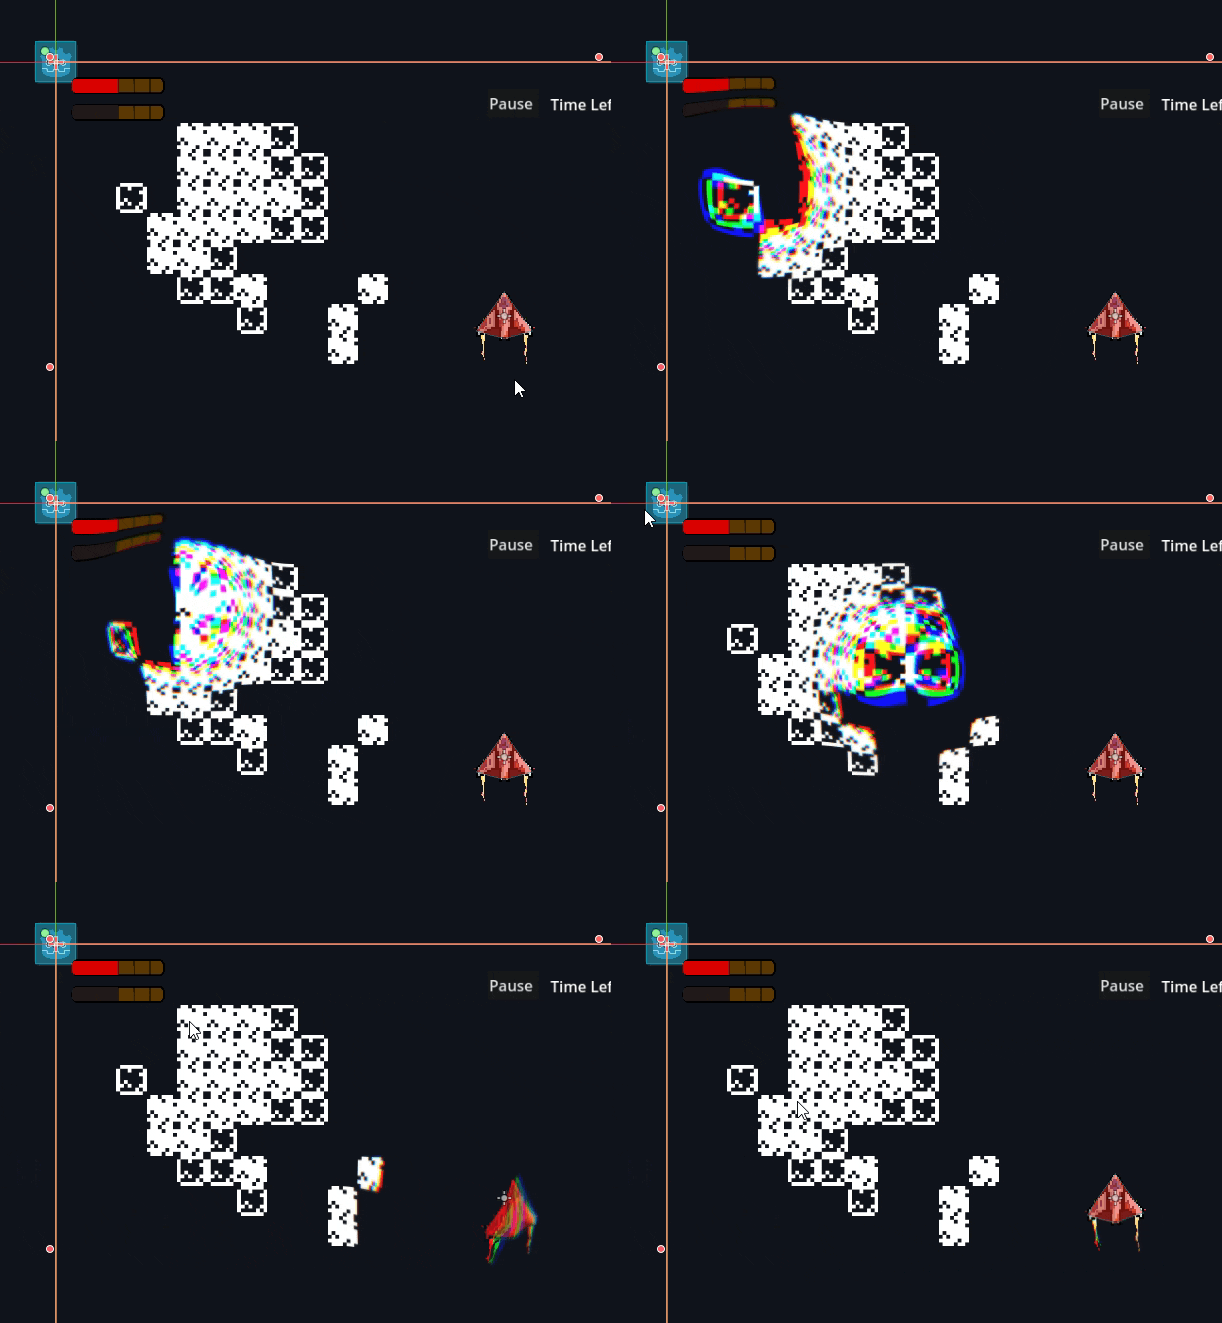
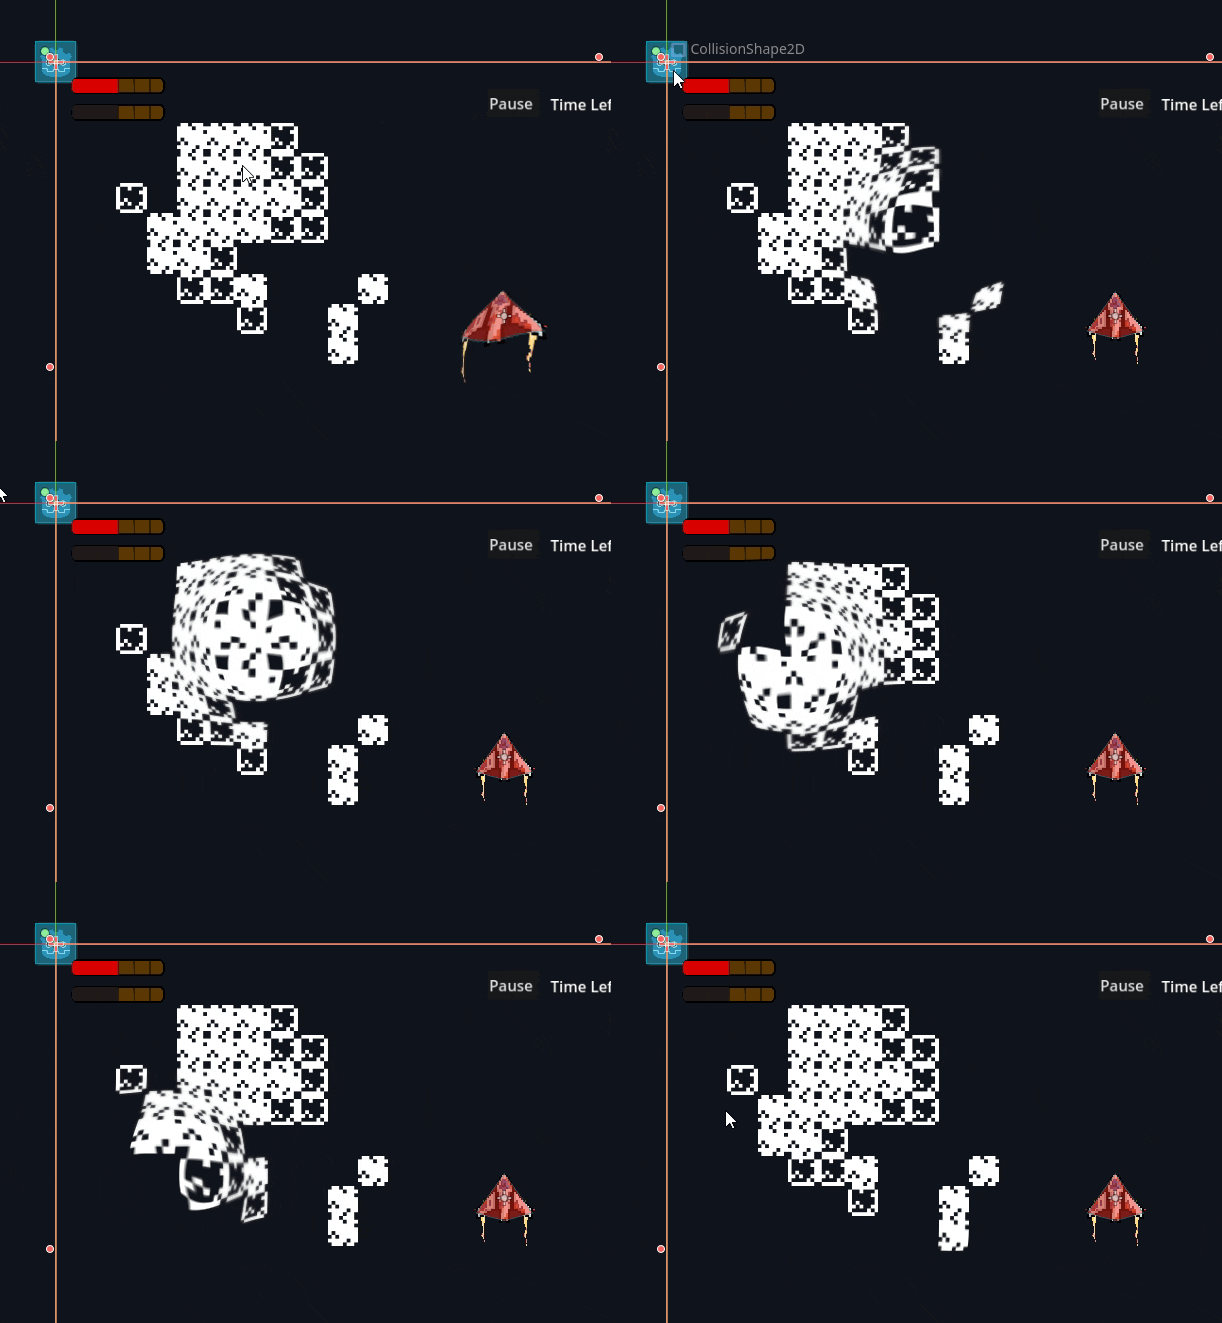
This tutorial is based on this work & is not my original work. The spaceship you see here is convered in my 2D spaceship with thrusters tutorial.
I had to add a distortion zone in my game, which can act as a portal. The place must have shockwave, distortion or space wrap like effect. I found a solution on godotshaders.com, so I used it. However, I am writing a tutorial on it here so people learning shaders can understand it. This shader also has chromatic aberration effect with it.

I made a 3D fast travel distortion shader as well. Something I think is related to it.
Defining Uniform Variables
Uniforms are variables that are sent from CPU to GPU. Most of them have unchanged values, but we will control center from GDScript in real-time:
shader_type canvas_item;

// Core distortion parameters
uniform float strength: hint_range(0.0, 0.1, 0.001) = 0.08;
uniform vec2 center = vec2(0.5, 0.5);
uniform float radius: hint_range(0.0, 1.0, 0.001) = 0.25;

// Visual effect parameters
uniform float aberration: hint_range(0.0, 1.0, 0.001) = 0.425;
uniform float width: hint_range(0.0, 0.1, 0.0001) = 0.04;
uniform float feather: hint_range(0.0, 1.0, 0.001) = 0.135;strength: How powerful the distortion is (like how much it bends the space)center: Where the effect happens on the screen (0.5, 0.5 is the middle)radius: How big the effect isaberration: Creates that cool rainbow effect on the edgeswidth: How thick the distortion ring isfeather: How smooth the edges are
Getting Access to the Screen
We need to be able to see what’s on the screen to distort it:
uniform sampler2D SCREEN_TEXTURE : hint_screen_texture, filter_linear_mipmap;
This line gives us access to whatever is being displayed on the screen.
Fragment Shader
This is where the actual distortion happens. We’ll break it down into steps:
void fragment() {
    // 1. Basic Setup
    vec2 screen_uv = SCREEN_UV;

    // 2. Fix the Stretching
    float aspect_ratio = SCREEN_PIXEL_SIZE.y/SCREEN_PIXEL_SIZE.x;
    vec2 aspect_corrected_uv = (screen_uv - vec2(0.0, 0.5)) / vec2(1.0, aspect_ratio) + vec2(0.0, 0.5);
This first part sets up our coordinates. SCREEN_UV gives us the position we’re working with, and we fix it so the effect looks circular instead of oval.
    // 3. Find Distance from Center
    vec2 distance_from_center = aspect_corrected_uv - center;

    // 4. Create the Ring Shape
    float distance_length = length(distance_from_center);
    float outer_edge = smoothstep(radius - feather, radius, distance_length);
    float inner_edge = smoothstep(radius - width - feather, radius - width, distance_length);
    float distortion_mask = (1.0 - outer_edge) * inner_edge;
Here we’re creating the ring shape where our effect will appear. The smoothstep makes the edges nice and smooth instead of harsh.
    // 5. Calculate How Much to Bend
    vec2 distortion_direction = normalize(distance_from_center);
    vec2 distortion_offset = distortion_direction * strength * distortion_mask;

    // 6. Apply the Bend
    vec2 distorted_uv = aspect_corrected_uv - distortion_offset;
This part figures out which way and how much to bend the image.
    // 7. Add Rainbow Effect
    vec2 color_separation = distortion_offset * aberration * distortion_mask;

    // 8. Put It All Together
    vec2 final_uv = mix(screen_uv, distorted_uv, distortion_mask);

    // 9. Sample Different Colors
    vec4 red_channel = texture(SCREEN_TEXTURE, final_uv + color_separation);
    vec4 base_color = texture(SCREEN_TEXTURE, final_uv);
    vec4 blue_channel = texture(SCREEN_TEXTURE, final_uv - color_separation);

    // 10. Final Color
    COLOR = vec4(
        red_channel.r,
        base_color.g,
        blue_channel.b,
        1.0
    );
}
The final part creates that cool chromatic aberration effect (the rainbow edges) by slightly offsetting the red and blue colors.
Using the Shader
Apply this shader to a ColorRect node or TextureRect node or any canvas_item in general by creating a ShaderMaterial in inspector and applying this shader on it. And attach a script to it. For testing, I will pass an object as @export variable. And in code, we will display the effect at the global position of that object.
Attach this script on the ColorRect node where this shader is applied:
@tool # To view this in editor. Otherwise remove @tool keyword

extends ColorRect  # or whatever node type you're using

@export var node_2d: Node2D # Which node to apply this shader to

@onready var camera_2d := get_viewport().get_camera_2d()

func set_distortion_center(world_position: Vector2) -> void:
	if camera_2d == null: camera_2d = Camera2D.new()

	# Get the current viewport size
	var viewport_size: Vector2 = get_viewport_rect().size

	# Get the camera's center position (accounts for smoothing and limits)
	var camera_center: Vector2 = camera_2d.get_screen_center_position()

	# Calculate screen position (normalize to 0.0 - 1.0 range)
	var screen_position: Vector2 = (
		# First convert world position to screen coordinates
		(world_position - camera_center) * camera_2d.zoom +  # Apply camera zoom
		viewport_size / 2  # Center offset
	)

	# Convert to normalized coordinates (0-1 range)
	var normalized_position = screen_position / viewport_size

	# make sure material is ShaderMaterial
	material.set_shader_parameter("center", normalized_position)


# Example: Update center when mouse is clicked
func _process(delta):
	var world_pos = node_2d.global_position
	set_distortion_center(world_pos)
And thats it! Thank you for reading <3


