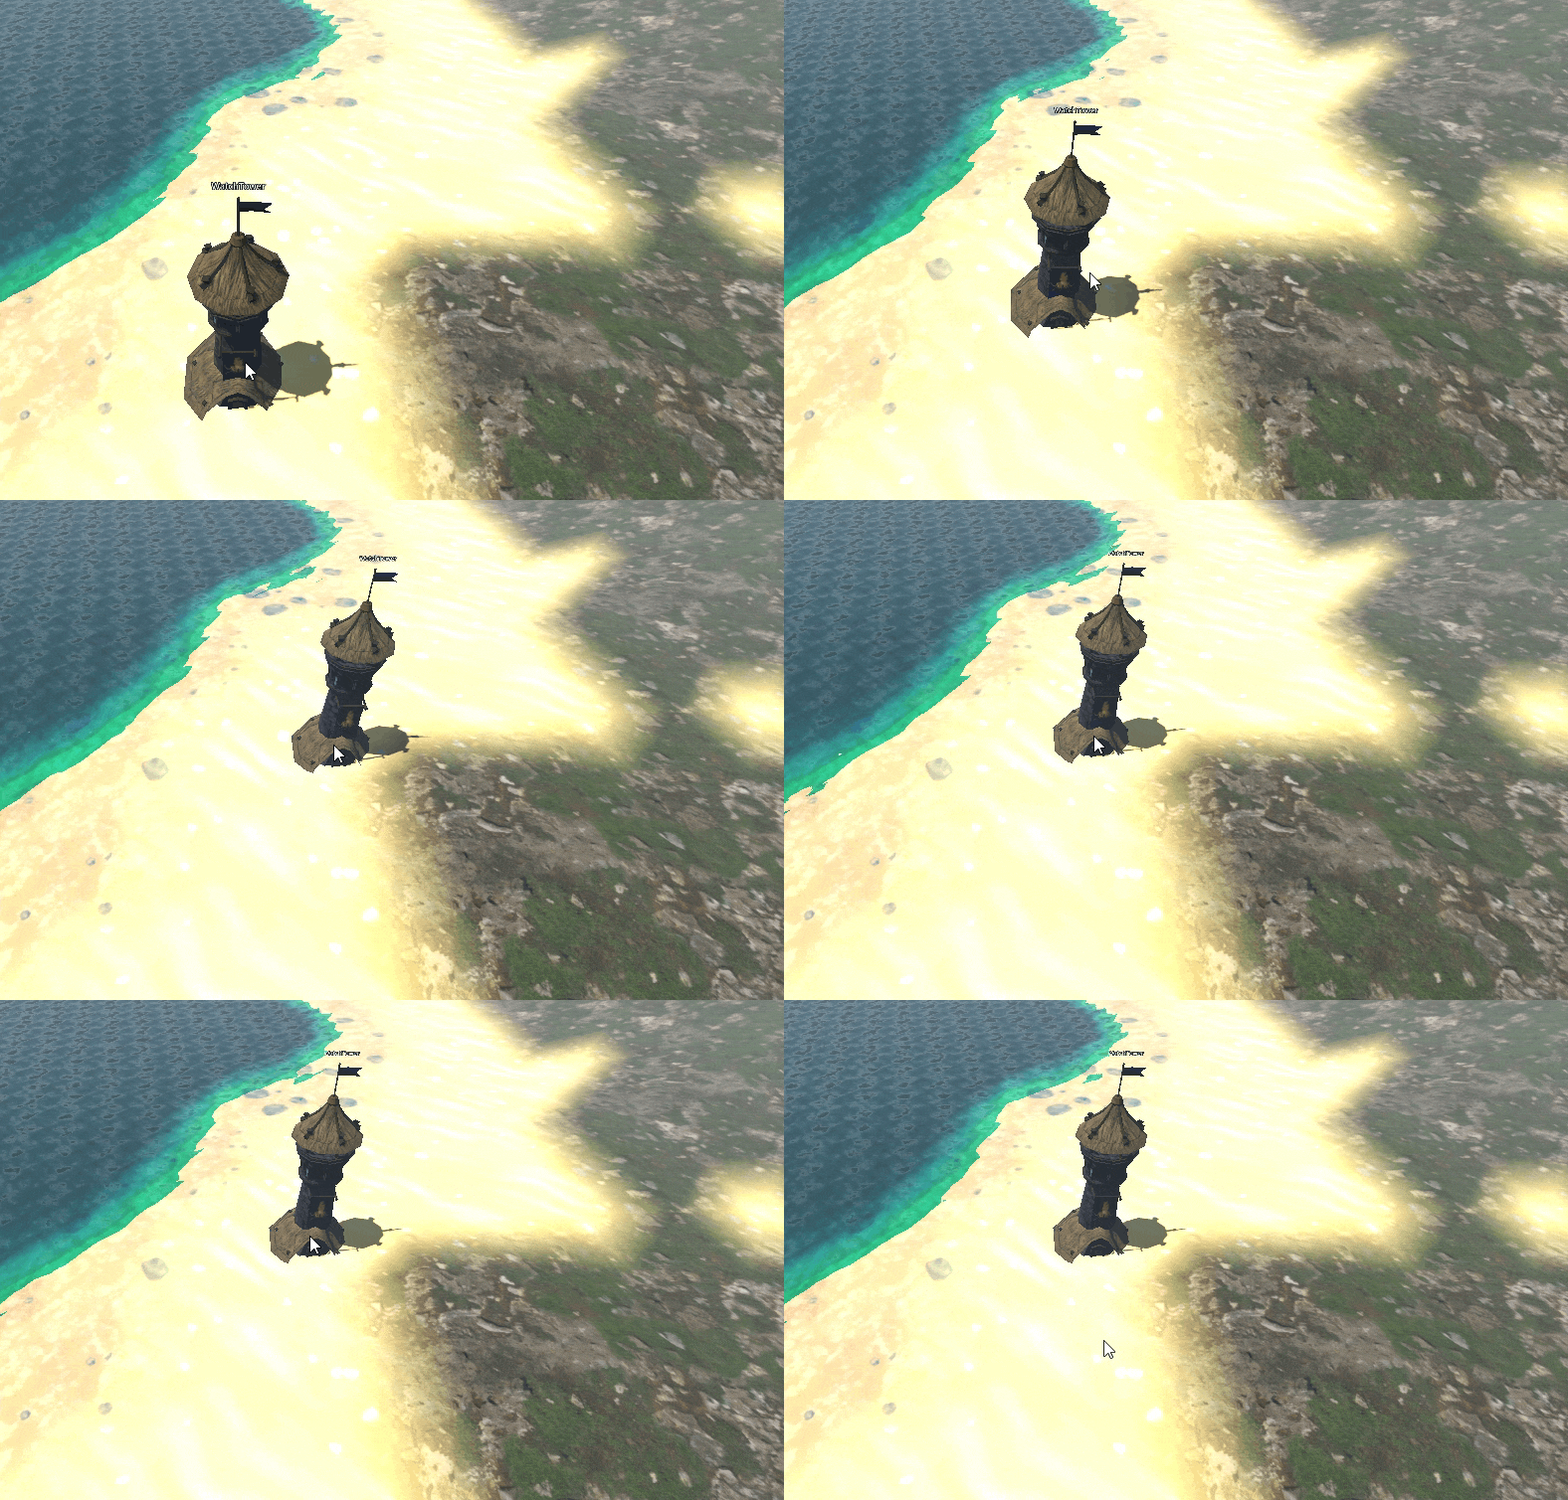
In most RTS games, we can place buildings. But different games have different approaches. Some instantly spawn building at the clicked-position, others require a builder to slowly complete it. In my RTS tutorial series, I am making a Stronghold-style building placement, where a building is instantly placed where use clicks.
However, the stockpile must have sufficient resources needed for the building to be placed.
How to place buildings in RTS
Start by creating a folder named ‘BuildingPlacementSystem”. In this, create a scene with Node3D root. Attach a script to the scene.
In the script, first we need a building to place. We have to create the building we are wishing to place by instancing one of the building scenes. After instancing it, we store it in currently_placing_building. It is a variable used to store the building temporarily until user clicks the mouse to finalize its position in the map.
While user has not finalized its position, its position is assigned to be the mouse position on the map. Mouse position on the map is calculated by raycast (using our Raycast System we made earlier).
We will talk about semi_transparent_material later (see code below).
extends Node3D


@export var level_root: Node3D # Reference to our Level node

# assign a building you want to place
@export var currently_placing_building: Building

# Material to apply to the building when placing it
@export var semi_transparent_material: ShaderMaterial


func _ready():
	pass


func _process(delta):
	if currently_placing_building:
		if not currently_placing_building in level_root.get_children():
			level_root.add_child(currently_placing_building)
		_apply_semi_transparent_material()
		# Also disable the building's collisions so it canot hit other physics bodies
		currently_placing_building.process_mode = Node.PROCESS_MODE_DISABLED

		var target_pos = RaycastSystem.get_mouse_world_position(0b00000000_00000000_00000000_00000001)
		if target_pos:
			currently_placing_building.global_transform.origin = target_pos
		else:
			currently_placing_building.global_transform.origin = Vector3(0,0,0)

		if Input.is_action_just_pressed("left_mouse_button"):
			_remove_semi_transparent_material() # Before we make the building permanent
			currently_placing_building.process_mode = Node.PROCESS_MODE_INHERIT # Re-enable physics
			currently_placing_building = null # Reset the building being placed
			print("Placed building")
In our game, we might want to make the building semi-transparent when it is selected but still not placed on the map. For this, I used semi_transparent_material. We apply semi-transparent material when it is selected and remove this material when finally placed. Thus implement _apply_semi_transparent_material & _remove_semi_transparent_material as well:
# Use DFS to search the entire branch of the building tree and apply the semi-transparent material
# to all the MeshInstances within that tree. Apply as material_override
func _apply_semi_transparent_material():
	var stack = [currently_placing_building]
	while stack.size() > 0:
		var node = stack.pop_back()
		if node is MeshInstance3D:
			var mesh_instance = node as MeshInstance3D
			mesh_instance.material_overlay = semi_transparent_material
		else:
			for child in node.get_children():
				stack.append(child)


# Use DFS to search the entire branch of the building tree and remove the semi-transparent material
# from all the MeshInstances within that tree. Set material_overlay to null
func _remove_semi_transparent_material():
	var stack = [currently_placing_building]
	while stack.size() > 0:
		var node = stack.pop_back()
		if node is MeshInstance3D:
			var mesh_instance = node as MeshInstance3D
			mesh_instance.material_overlay = null
		else:
			for child in node.get_children():
				stack.append(child)
I used depth-first search (DFS) to traverse the whole scene tree of our character. And whenever we find a MeshInstance3D node, I assigned material_overlay on the mesh to be our transparent material.
This step is optional as sometimes you might not want to apply semi-transparent material. But I showed it so you will get an idea of what you can do to make the selected vs placed buildings distinct from each other.
Appendix: Place buildings snapped with the A-star Grid (important)
Tip 1: Although I forgot to do it, I later figured out that it is better to align the building placement to the pathfinding grid size. So buildings must be placed more uniformly on the a-star grid and thus navigation becomes more accurate.
Make sure to keep the building position snapped to the grid of the a-star navigation system. So when the building is placed, we will have to disable or remove those points from the a-star graph that lie inside the building. If the building is not snapped (aligned) with the grid cells, then we might get invalid path finding as some points might lie on the boundary or partially inside.
However, this step is also not necessary for all the games as some games might prefer to place the building anywhere the user desires.
Appendix: Place buildings only when stockpile has enough resources
Make sure that the building scene is instanced only when the stockpile has the resources requires for the building. Otherwise, issue an error of “not enough resources”. This logic also depends on the game, so I omitted it.
Appendix: How to instance the building to place
It depends on the game. You can create a UI with icons for all the buildings. If user presses a particular icon, the scene corresponding to that building is instantiated and assigned to the currently_placing_building.
Temporarily the building will be the child of the BuildingPlacementSystem node, until user places it in the world. Then it becomes child of the Level.
Thank you for reading <3

