So far in this RTS tutorial series, we already created a unit in previous state management tutorial. It has two states that we did not handle, DYING & DIED. Both of these states require health to be there, in order to determine if player has died or not. Additionally, we have to dynamically display the health bar so user knows the current status of a unit’s health.
Health System Breakdown
Health system has 2 parts:
- A
healthvariable. And functions to control/update health (increase (as when drinking potions), and decreasing (as when being hurt)). - A visual part to display health on top of a unit. The value of health comes from the
healthvariable, and the percentage of health is computed based onmax_healthvs the currenthealth.
Implementing Health in Units
Go back to the Unit.gd script from our previous state machine-based unit tutorial. Then add two more variables to the code:
@export var max_health: float = 100 # maximum possible health
var health: float = max_health # Initial health is max
And in _check_state_transitions function, make sure to add transitions to DYING state if condition (health < 0) becomes true. So this is how your _check_state_transitions should look like now (in Unit.gd):
func _check_state_transitions(delta: float):
	if self.health < 0:
		if current_state != UnitState.DIED: # If not already dead
			current_state = UnitState.DYING

	elif Input.is_action_just_pressed("left_mouse_button") and self in get_tree().get_nodes_in_group("selected_units"):
		# reset path when clicked
		current_agent_path.clear() # Can be a source of bug, if extended script expects path to be there
		current_agent_path_index = 0
		current_state = UnitState.MOVING

	# Clear the path when the destination is reached
	elif current_agent_path_index >= current_agent_path.size():
		current_state = UnitState.IDLE
Notice we did not transit to DIED state, we only transited to DYING state. Why? Because, once DYING is triggered, we will use some other measure to transit to DIED state. This measure might be waiting for a timer to timeout, or letting dying animation to complete in order to change state to DIED. In died state, we only do queue_free().
Finally, this is the implementation of _process_died_state & _process_dying_state functions:
func _process_died_state():
	if current_state == UnitState.DIED:
		# queue_free() or do nothing (let him lay dead)
		pass


func _process_dying_state():
	if current_state == UnitState.DYING:
		pass # I played dying animation, but you can just do anything while unit is dying
Now we are going to create a health bar. We will come back to the Unit to integrate the health bar with it.
Creating a Health Bar
Create a new folder named “HealthBar”. Then create a scene with same name. Make sure the root node of the scene is of TextureProgressBar type. Attach a script to the root.
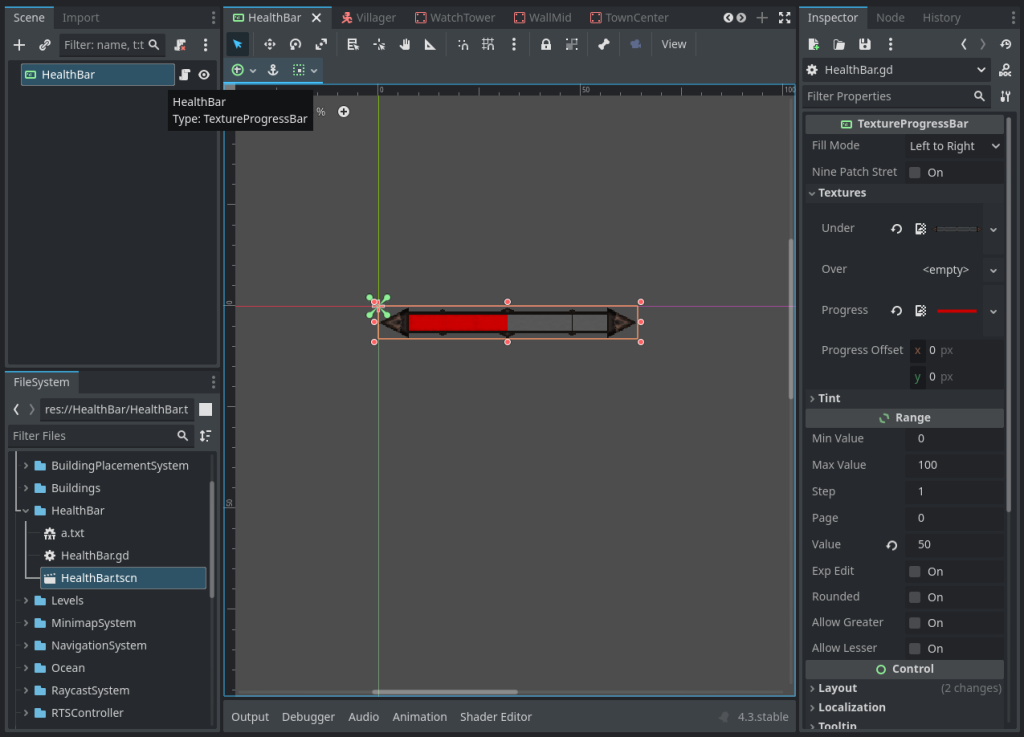
To the TextureProgressBar node, add appropriate textures (on right side panel). This is how the overall scene looks like:

In the script, update the health-bar’s progress based on the parent unit’s health.
"""
Docs:
	- Parent character must have 'health' & 'max_health' properties
"""


extends TextureProgressBar

# The 3D character whose health this bar represents
@export var character: Node3D
# Camera to calculate screen-space position
var camera: Camera3D

func _ready():
	# Get the active camera
	camera = get_viewport().get_camera_3d()

	# Set the initial value to a placeholder (e.g., full health)
	if character and "max_health" in character:
		value = character.max_health
	if character and "health" in character:
		value = character.health

func _process(delta):
	if not character or not camera:
		return

	# Update health bar value
	if character and "health" in character:
		value = character.health
In above code, we created a variable to store the reference of our character (which is our RTS unit). Then we read the values of health and max_health and assign TextureProgressBar‘s value based on it.
Aligning the Health Bar on Top of Character
So far we created a health-bar, but since it is a Control node, making it the child of Unit node will not make it follow the unit. Also, since the units are in 3D, so it becomes even more difficult to get the exact position to draw health bar on.
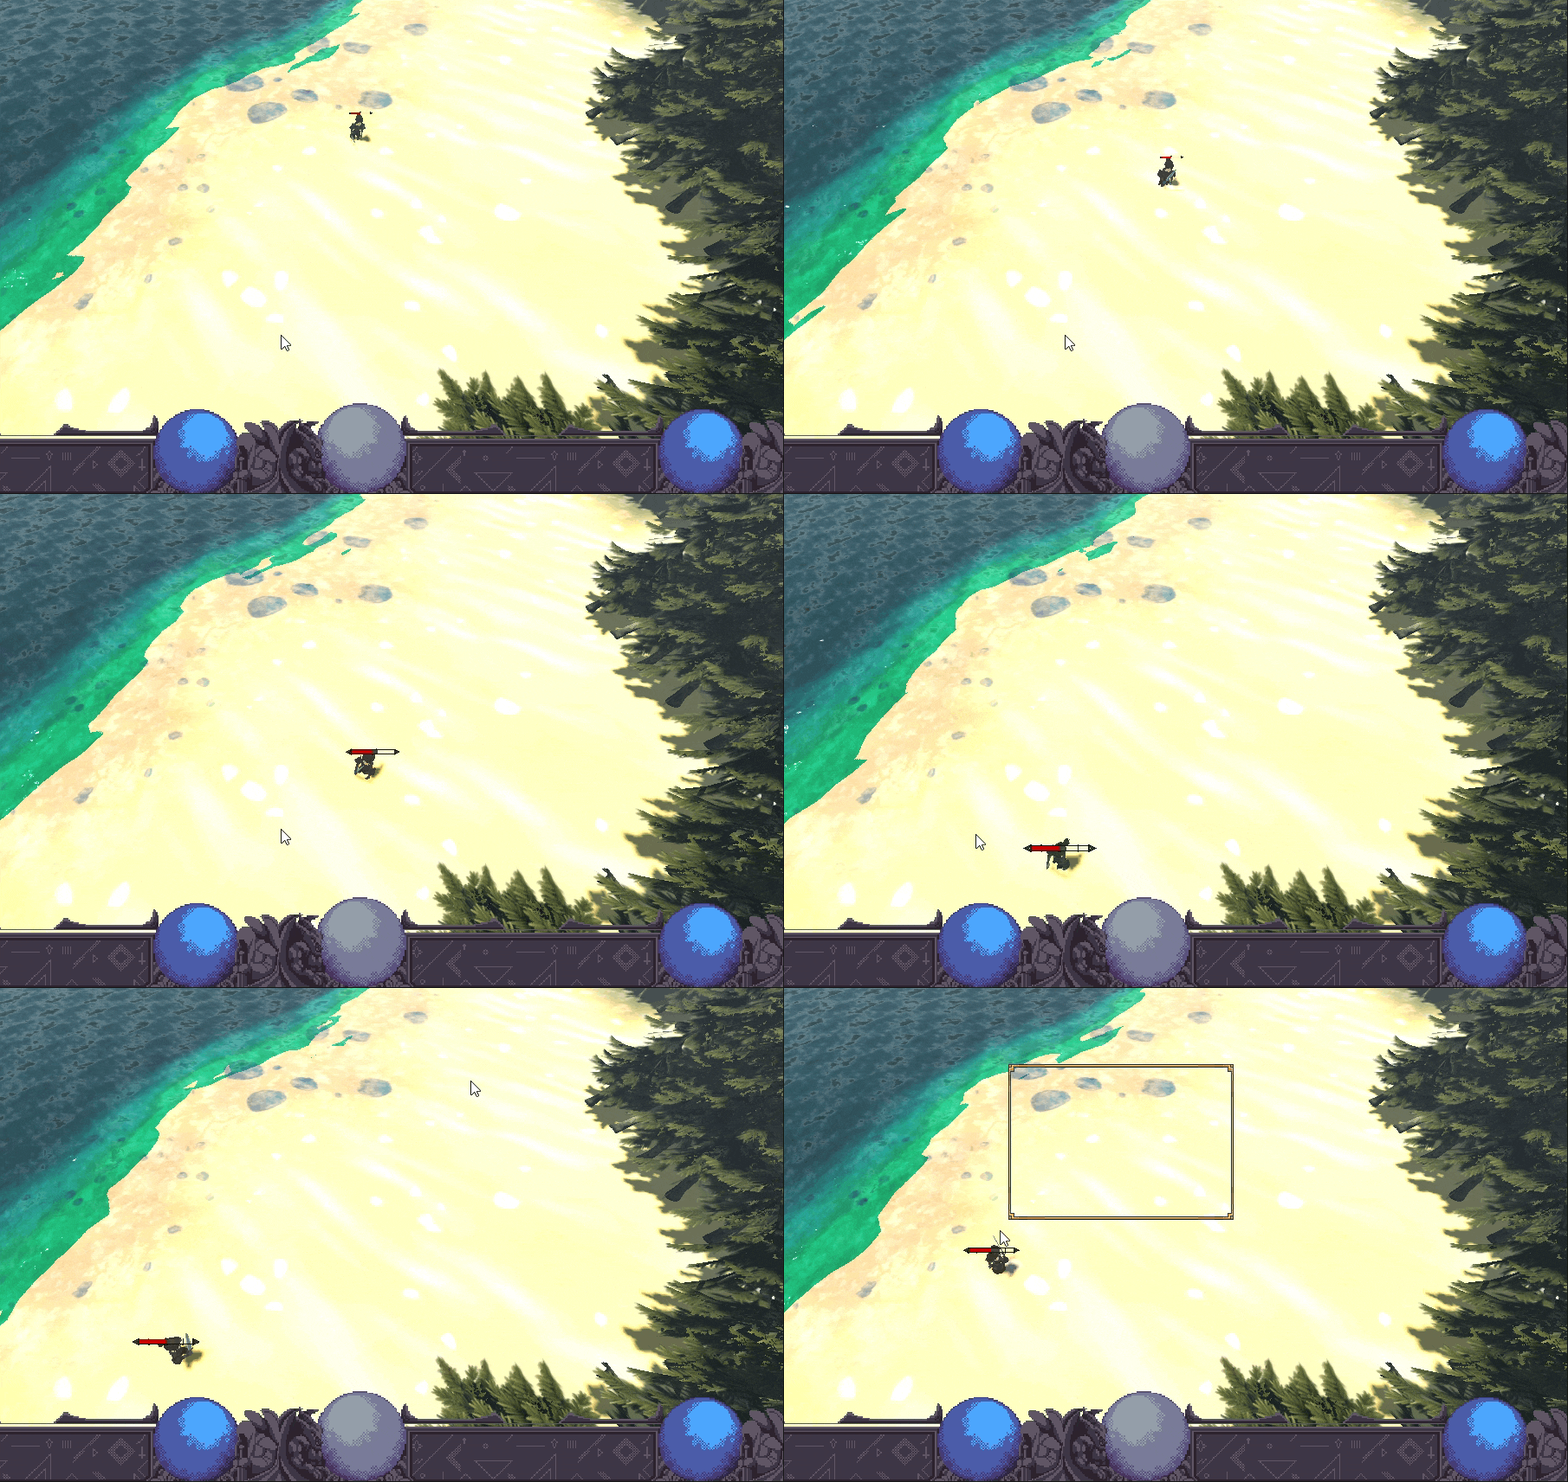
So, I used an approach in which first we convert the unit’s position from 3D world space to the screen space. Then we will draw the health bar in that screen space position. To convert screen space position from world space 3D position, we use camera.unproject_position function in Godot engine. We will assign this position to the health bar position.
func _process(delta):
	# ... PREVIOUS CODE ...

	# Convert the 3D character's global position to screen-space coordinates

	var screen_pos = camera.unproject_position(character.global_position)
	global_position = screen_pos
	#  you can adjust the position for visual clarity
	global_position += Vector2(-get_rect().size.x / 2, 0)
But, here we get another problem, the health-bar shows on the origin of our 3D character, which is usually at the feet of the character. To solve this issue, we add an offset to the character position. Thus instead of above code, use this:
func _process(delta):
  # ... PREVIOUS CODE...

	# Convert the 3D character's global position to screen-space coordinates
	# with some Offset upward (e.g., above the character)
	var screen_pos = camera.unproject_position(character.global_position + Vector3(0, 10, 0))
	global_position = screen_pos
	#  you can adjust the position for visual clarity
	global_position += Vector2(-get_rect().size.x / 2, 0)
Making Health Bar Change Size with Distance
TO make it even more fancier, we want to change the size to smaller if health bar is distant from the camera. For this, add the following code at the end of _process:
func _process(delta):
  # ... EXISTING CODE ...

	# Adjust scale based on distance from camera
	var distance = camera.global_transform.origin.distance_to(character.global_transform.origin)
	var scale_factor = clamp(1.0 - distance / 100.0, 0.11, 2.0)
	scale = Vector2(scale_factor, scale_factor)
The above code just takes the distance from our 3D RTS camera and the character, and based on that distance, calculates the scale of the health bar node.
Thats all. To use the health bar, make it the child of the Unit. Then select the health bar node & assign the @export variable character to be the (parent) unit in inspector.
Thank you for reading <3

